

Elementor Forms make it easy to collect information from your website visitors, whether you’re creating contact forms, quote request forms, booking forms, surveys, or lead generation forms.
However, some form fields require users to select a value within a specific range, such as a budget, loan amount, discount percentage, quantity, rating, or project cost. Asking users to manually type these values can make forms less interactive and may lead to typing mistakes or invalid entries.
This is where a Range Slider becomes useful.
A Range Slider allows users to select a value by simply dragging a slider handle along a predefined scale, reducing manual errors such as typos, out-of-range inputs, and formatting issues.
But, here is the problem: by default Elementor does not include a range slider.
To add this functionality, you’ll need an addon such as Cool FormKit.
Cool FormKit is an advanced addon that extends Elementor Forms with advanced 25+ form fields, like conditional fields, range slider, rating field, and more.
In this guide, you’ll learn how to add a Range Slider to an Elementor Form step by step.
But before we begin, let’s understand what a Range Slider is and how it can improve your form experience.
What is a Range Slider for Elementor Form?
A Range Slider is a form input field that lets users choose a value by moving a slider handle within a specified range.
It is particularly useful when users need to select a value between minimum and maximum limits, such as an age group, project budget, loan amount, or even an Elementor Price range slider for products and services.
To better understand how it works, here’s an example:
Imagine an insurance company offering an insurance plan only to applicants aged 18-40. Instead of asking users to type their age manually, you can let them select it by using a range slider, ensuring that users can only select ages within the eligible range.
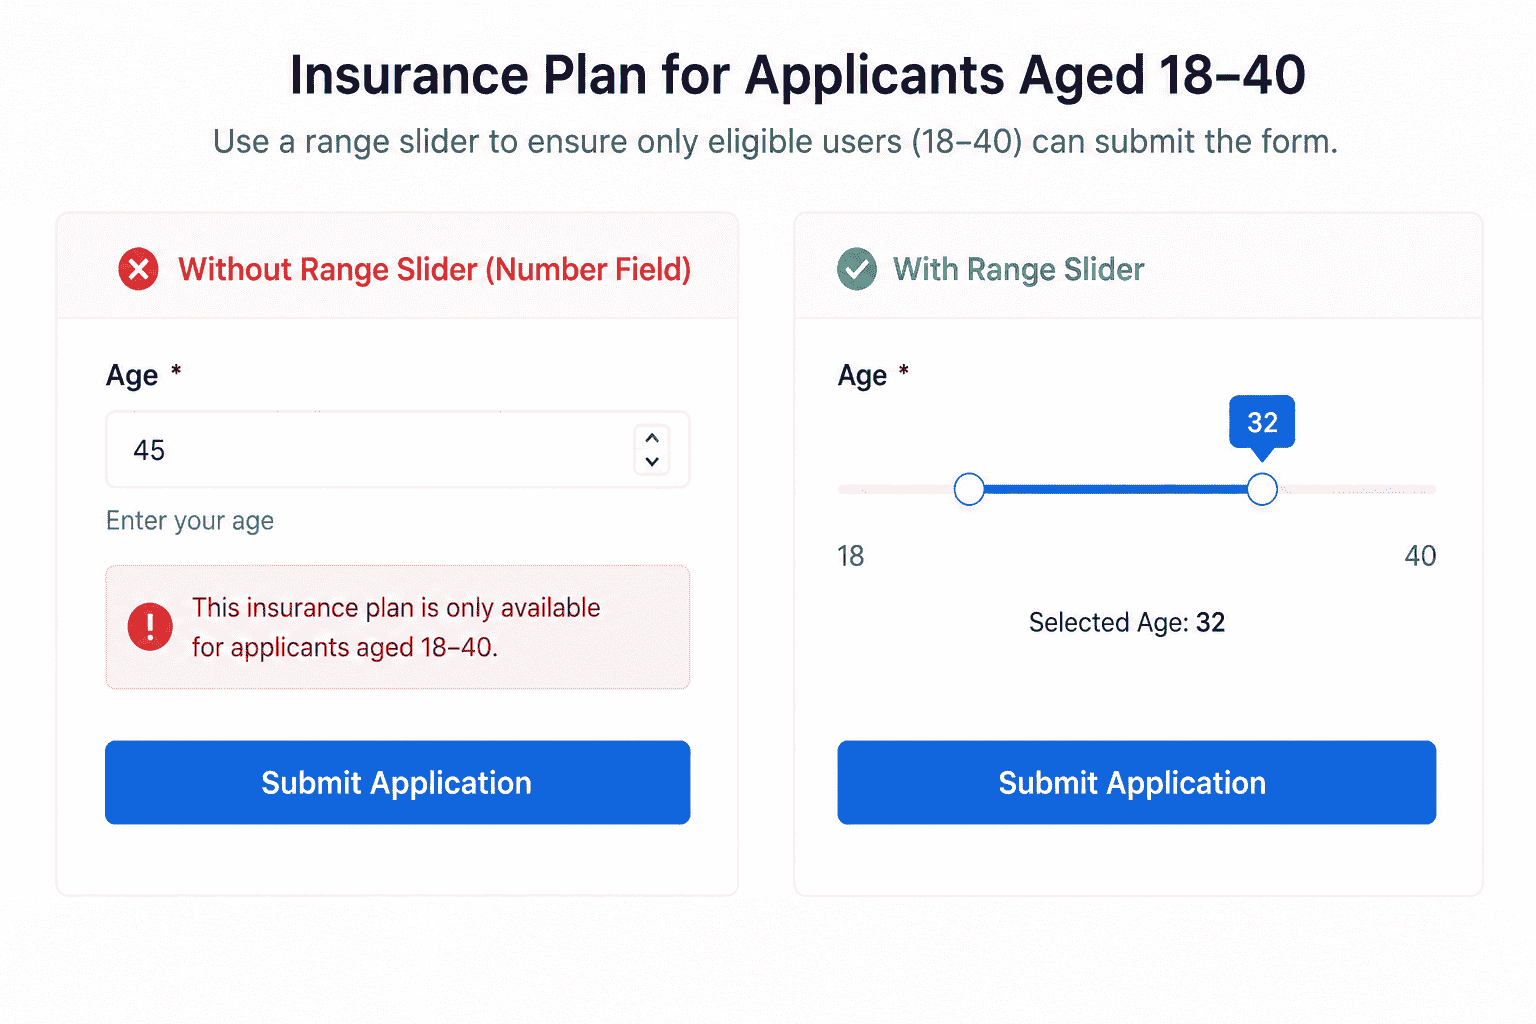
Thus, range sliders help collect inputs more efficiently and provide a smoother user experience in Elementor Forms.
Now, follow the steps below to add an Elementor Form Range Slider to your website.
Step-by-Step Guide to Add a Range Slider in Elementor Form
- Before getting started, make sure that the following plugins are installed and activated on your WordPress website:
- After installing these plugins, make sure you have enabled the range slider field feature in the WordPress Admin Panel >> Elementor >> Cool FormKit >> Form Elements Tab.
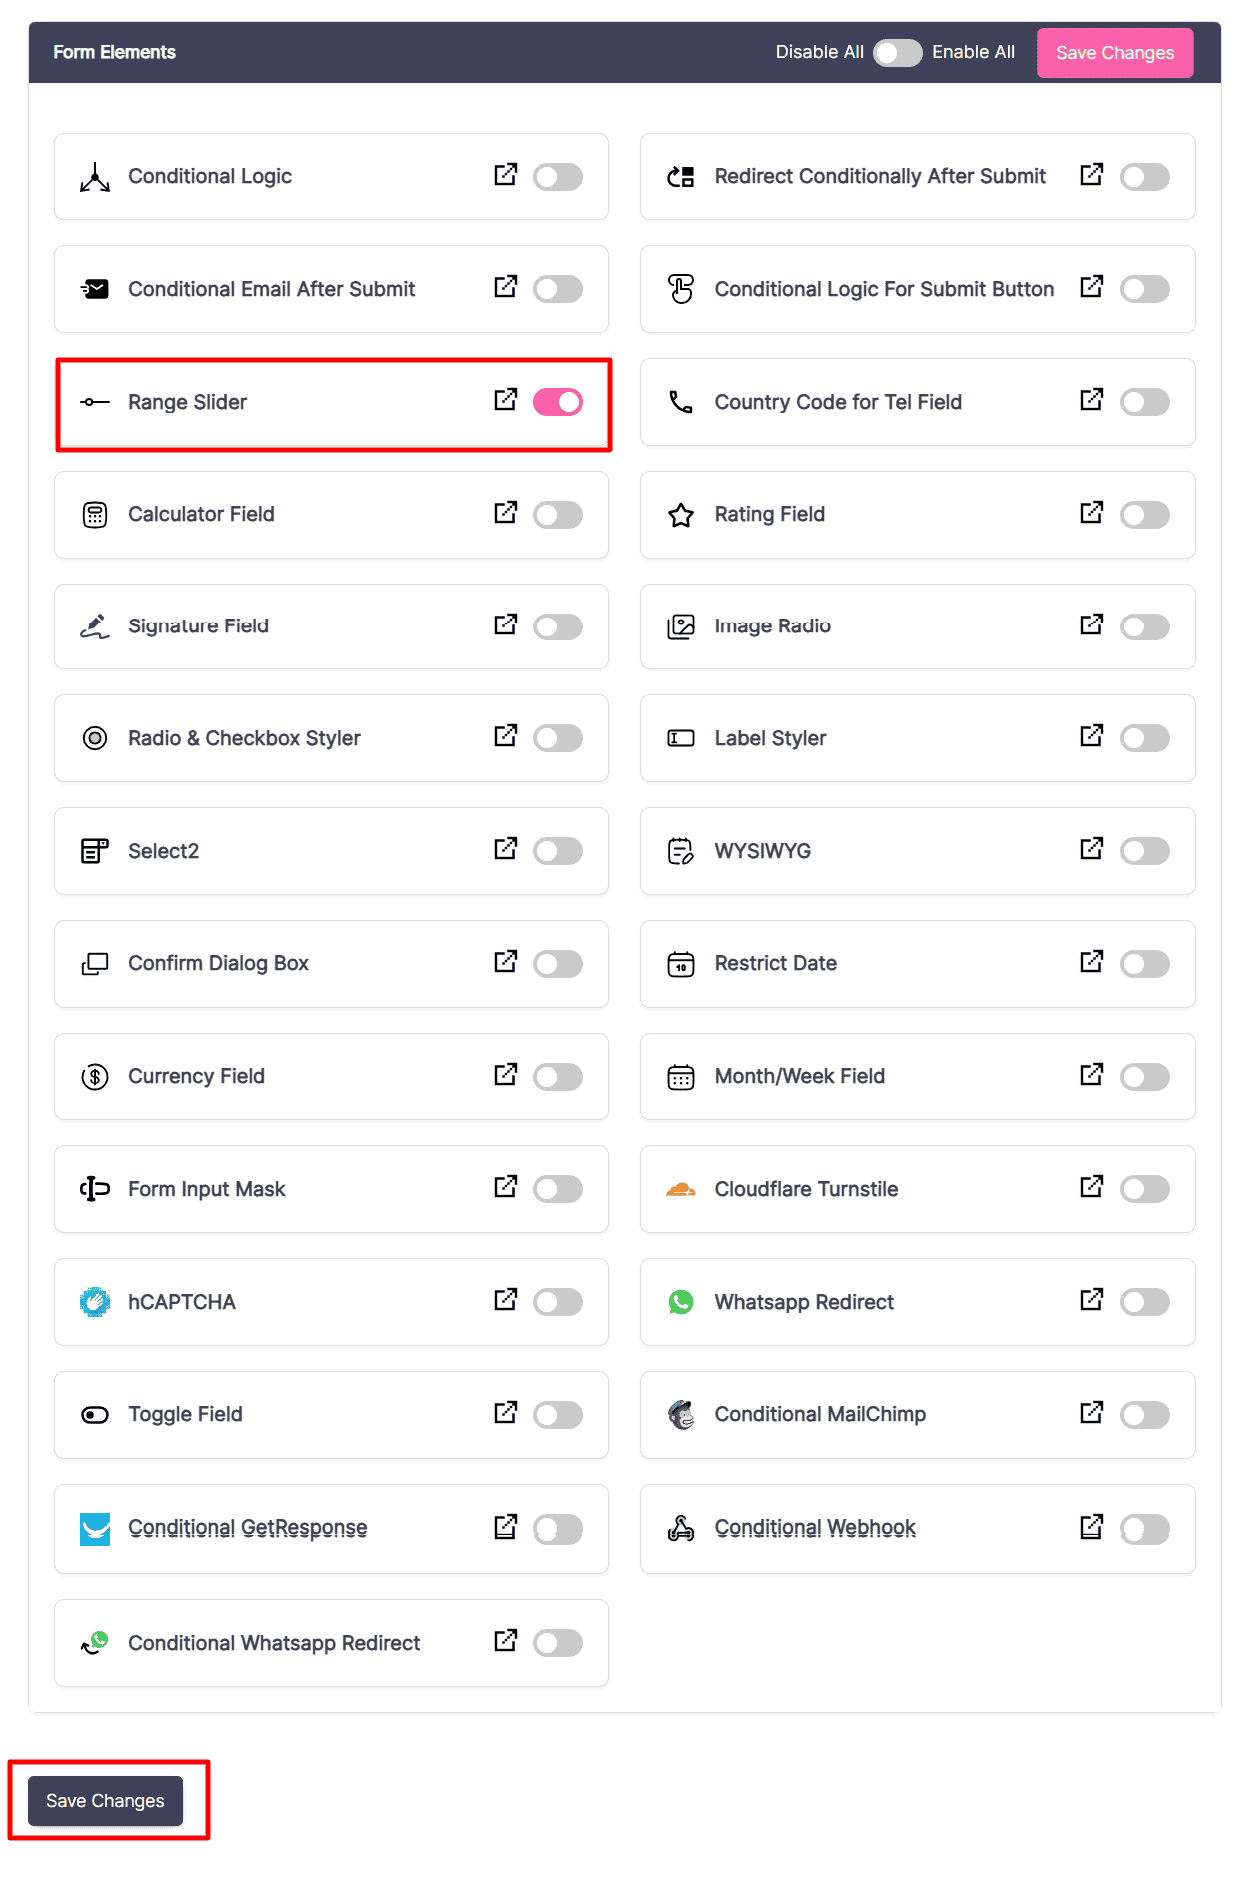
- Create a new form or edit the existing one with Elementor, where you want to add a range slider in the Elementor form.
- Navigate to the Content section of your Form Field.
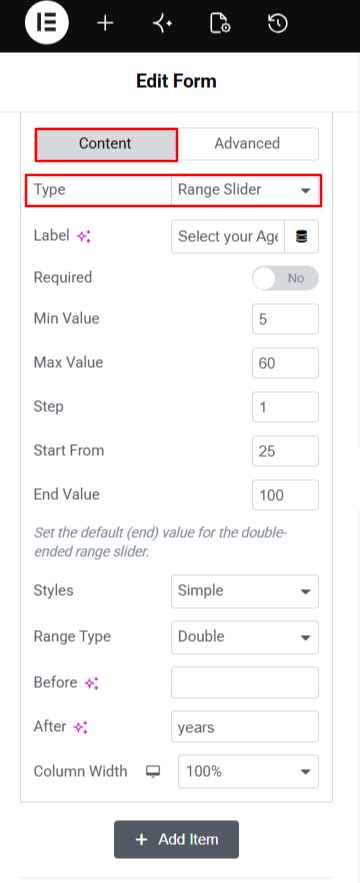
- Once you’ve selected the Range Slider field, you can customize its behavior and appearance using the following options:
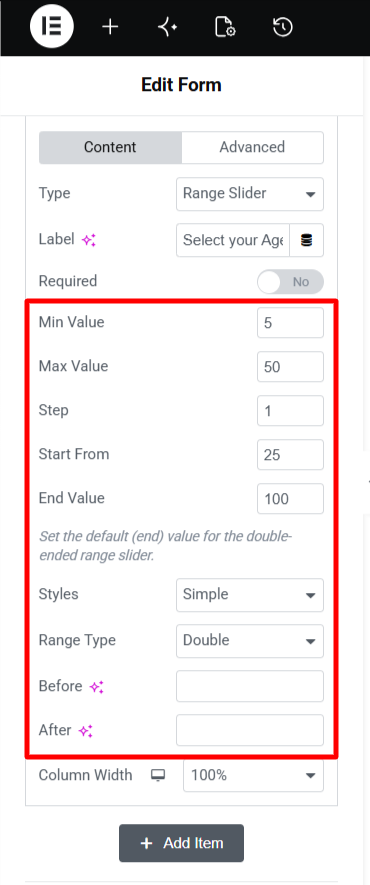
- Min Value : Sets the minimum value users can select on the slider.
- Max Value: Defines the highest value users can choose.
- Step: Determines the interval between selectable values. For example, a step value of 5 allows selections such as 5, 10, 15, and so on.
- Start From: Specifies the default starting position of the slider when the form loads.
- End Value: Sets the default ending value for a double-ended range slider.
- Styles: Allows you to choose the visual appearance of the range slider.
- Range Type: Lets you switch between a Single slider for selecting one value and a Double slider for selecting a range of values.
- Before: Adds custom text or symbols before the selected value (e.g.,$, age, INR).
- After: Adds custom text or symbols after the selected value (e.g., years, kg).
- Click Update or Publish at the bottom of the Elementor panel. View the live page to test the range slider field and make sure everything functions perfectly.
Conclusion
Adding a range slider to Elementor Forms is a simple way to make your forms more interactive and user-friendly.
By allowing users to select values within predefined ranges, you can reduce invalid submissions, improve data accuracy, and simplify the form-filling process.
So, install the Cool FormKit and start adding and customizing your Elementor forms with range sliders and other advanced fields.
FAQs
What is a range slider in Elementor Forms?
A Range Slider is a form field that lets users select a numeric value within a predefined range by dragging a slider handle instead of entering the value manually. It works as an Elementor slider input field for collecting numeric and other values within a specific range.
Does Elementor Pro include a built-in range slider field?
No. In Elementor Pro range slider field is not included by default. You need an addon such as Cool FormKit to add this functionality in your Elementor form.
Can I customize the minimum and maximum values of a range slider?
Yes, you can. Cool FormKit allows you to define custom minimum and maximum values, set step intervals, and specify default values for the slider.
What is the difference between a single and double range slider?
A Single Range Slider allows users to select a single value within a predefined range using one draggable handle. A Double Range Slider, on the other hand, enables users to select a range of values by adjusting two slider handles, one for the minimum value and another for the maximum value.