Want to showcase your company history, personal journey, achievements, roadmap, or important milestones on your website using timeline?
A timeline is one of the most engaging ways to present information in chronological order. Instead of displaying everything in plain text, timelines help visitors quickly understand your journey, events, or progress in a visually organized format.
In WordPress, there are several ways to create timelines using blocks, widgets, or shortcodes. However, shortcode-based timelines are often preferred because they are easy to create.
But here is a problem: many timeline plugins come with complicated setups, limited customization options, or require additional coding knowledge to display timelines via shortcode.
What is Cool Timeline?
Cool Timeline Pro is an advanced WordPress plugin that helps you easily create timelines for your website.
You can use it to display your company’s history, product roadmaps, personal stories, or key events in both horizontal and vertical timeline layouts. With Cool Timeline, you just have to:
- Create timeline stories
- Customize the timeline design
- Copy the shortcode & paste it anywhere on your website
Now, let’s discuss these steps in detail.
Steps to Display a Timeline Via Shortcode
Step 1: Install & Activate Plugin
- From your WordPress dashboard, navigate to Plugins > Add New.
- Search for Cool Timeline.
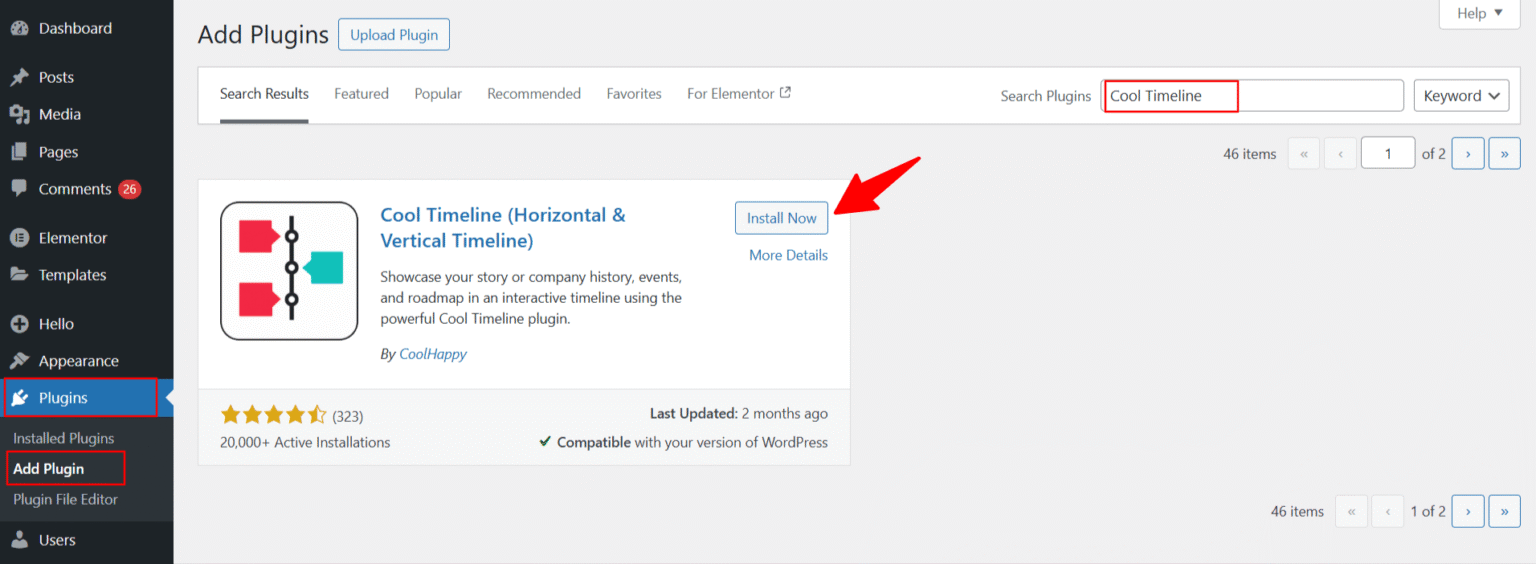
- Click Install and then click Activate.
Step 2: Create Timeline Stories
Timeline stories are the individual events or milestones that will appear inside your timeline. To create one:
- From your WordPress dashboard, navigate to Timeline Stories > Add New Story.
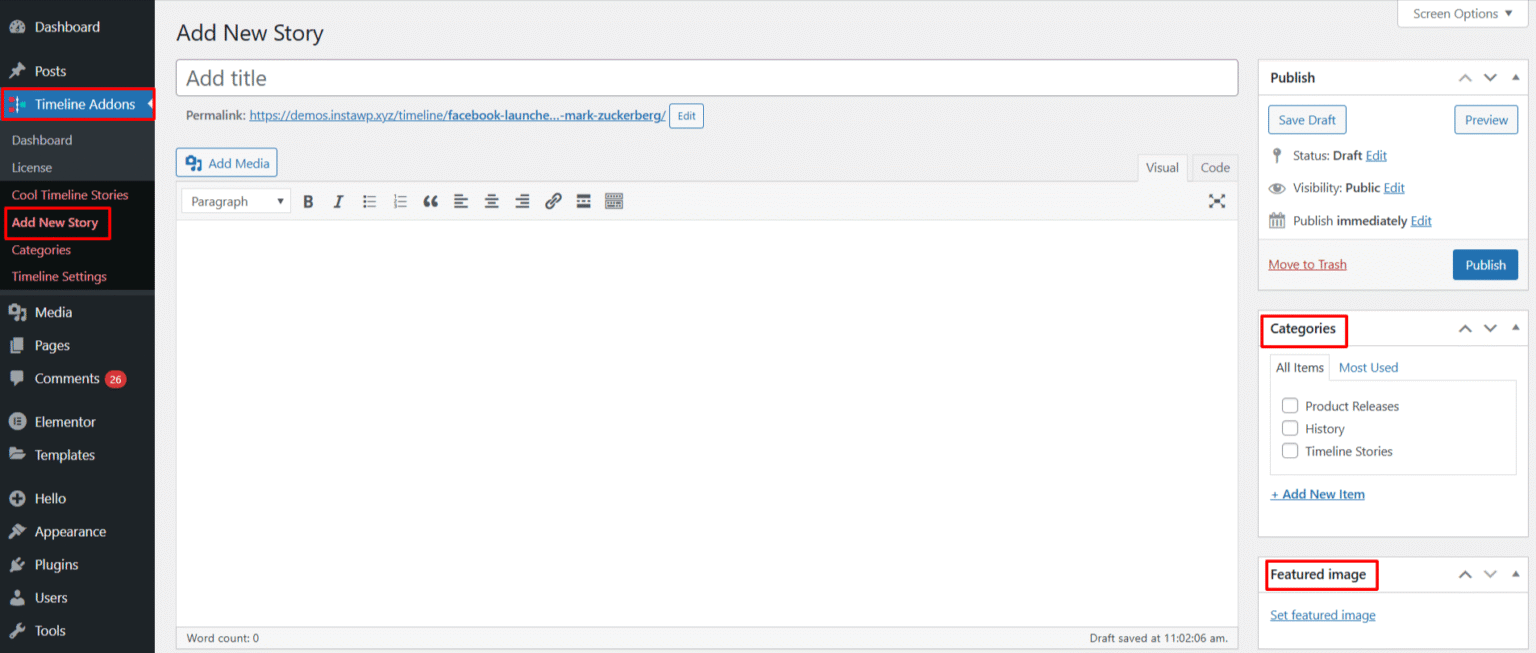
- Enter the story title, add the description or content, set the date for the timeline event, and upload an image or icon if needed. Learn More.
- Once completed, publish the story.
Similarly, you can create multiple timeline stories depending on requirements.
Step 3: Customize Timeline Design
Using the Cool Timeline plugin, you can easily customize the look of your timeline stories. You can access these settings from:
- From your WordPress dashboard, navigate to Timeline Addons > Timeline Settings.
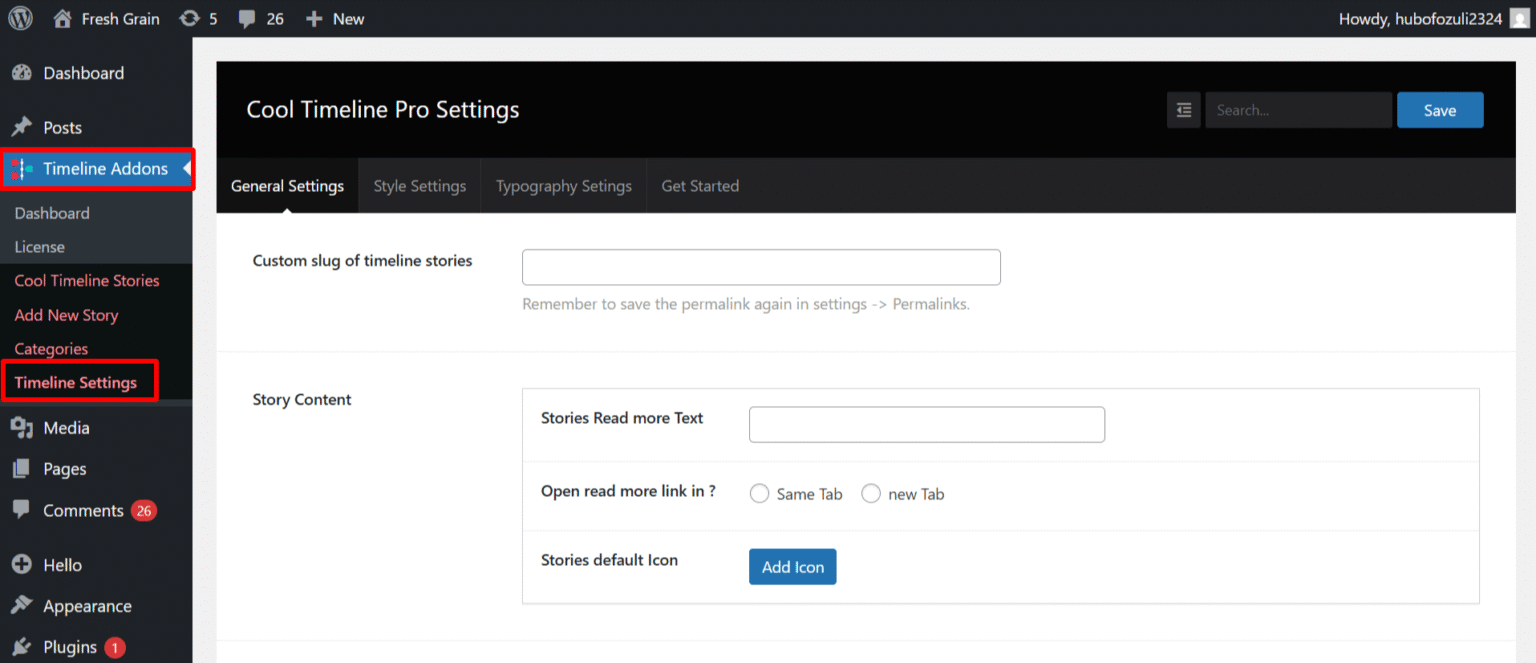
- Here you’ll find different sections such as:
- General Settings: for overall layout and timeline display options.
- Typography Settings: to control fonts, text size, and spacing.
- Style Settings: to customize colors, backgrounds, and other design details.
Step 4: Copy the Timeline Shortcode
Once you’ve created your timeline stories and customized the design, you can now display the timeline anywhere using a shortcode.
- Open any page or post in the Gutenberg editor.
- Click on the “+” Add Block button.
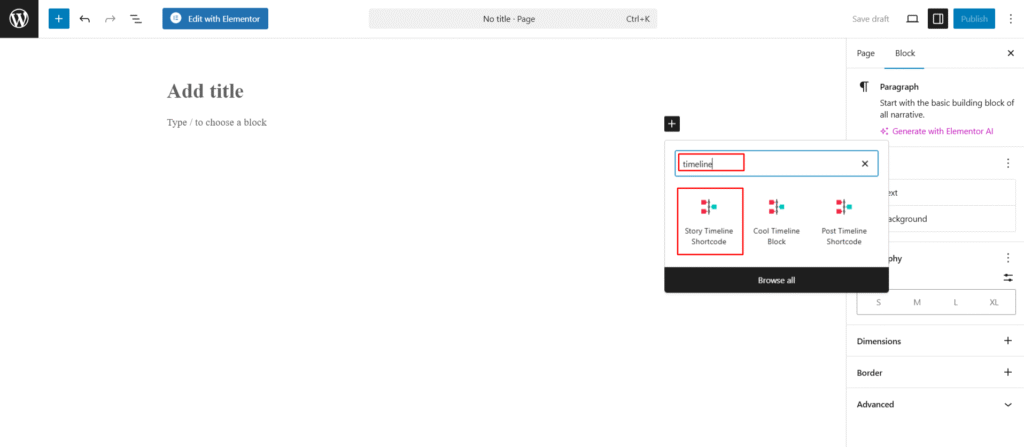
- Search for “Timeline” and select the Story Timeline Shortcode.
- The shortcode will be added to your page.
- After being satisfied, click publish.
Once you publish the page, your timeline will appear on the frontend automatically.
Additionally, Cool Timeline offers two layout options to choose from depending on your content and design needs:
- Vertical Timeline: A top-to-bottom layout, ideal for histories, portfolios, and step-by-step journeys
- Horizontal Timeline: A left-to-right layout, great for roadmaps and event sequences
Tips to Create an Engaging Timeline
To make your timeline more attractive and user-friendly, follow these best practices:
- Use Clear Dates: Always add accurate dates so visitors can easily follow the timeline sequence.
- Keep Content Short and Readable: Avoid adding very long paragraphs inside timeline stories.
- Add Images or Icons: Visual elements make the timeline more engaging and easier to scan.
- Consistent Styling: Use consistent colors, fonts, and spacing throughout the timeline.
- Highlight Important Milestones: Important achievements or events should stand out visually.
FAQs
What is the easiest way to create a timeline in WordPress?
The easiest way to create a timeline in WordPress is by using a dedicated timeline plugin like Cool Timeline. It allows you to create timeline stories and display them anywhere using a shortcode without coding.
How do I add a timeline shortcode in WordPress?
To add a timeline shortcode in WordPress, create your timeline stories using Cool Timeline, copy the generated shortcode, and paste it into any page, post, or widget area where you want the timeline to appear.
Can I create both vertical and horizontal timelines in WordPress?
Yes, Cool Timeline allows you to create both vertical and horizontal timelines. Vertical layouts are ideal for company history, while horizontal layouts work best for roadmaps and event sequences.
Can I customize the design of my WordPress timeline?
Yes, you can customize your WordPress timeline design by changing colors, typography, spacing, icons, and layouts to match your website branding and style.
Can I use timeline shortcodes in Gutenberg and Elementor?
Yes, timeline shortcodes work perfectly with both Gutenberg and Elementor. You can simply paste the shortcode into a shortcode block or widget to display the timeline on your website.