Adding a brand name to the website’s theme looks more professional, and most of the advanced websites made using WordPress have their custom website name. So here we will Rename Hello Elementor Theme to our own brand name. The only problem with this is, the theme will not get updated automatically, you have to update the theme manually whenever a new update comes.
Requirements :
- Any text editor software.
- The parent Hello and the child hello theme
After Downloading the required files you need to follow the steps in this tutorial
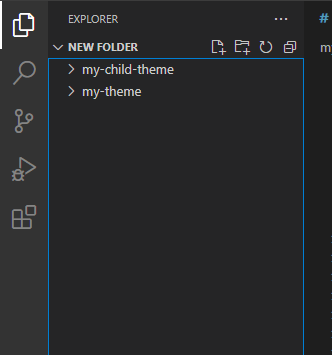
Step 1: Change hello theme
First of all, change the name of the hello “Parent theme” and “child theme”, here I have given them the names “my-theme” and “my-child-theme” respectively.
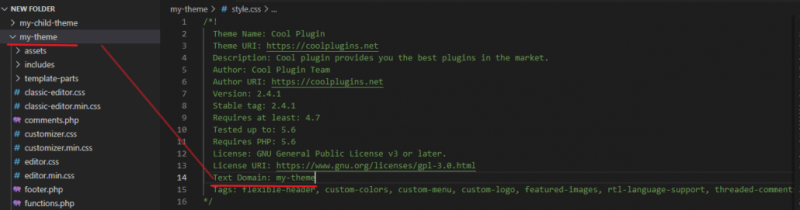
Step 2: Change the hello theme name in the CSS file.
Open any code editor, choose the hello parent theme, and edit the CSS file from the parent theme.
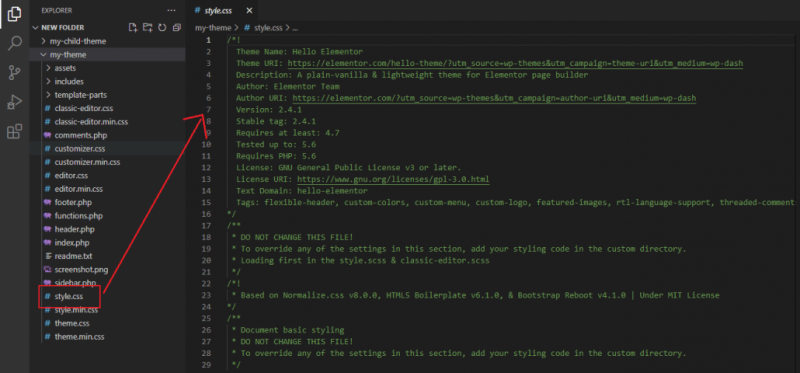
Editing the CSS file:
We will be doing some of the changes in this file, and anything between /* and */ is a comment that wordpress reads and adds the name from here to the dashboard.
Here in this CSS file, you can change :
- The theme Name will be displayed on the backend of your website.
- The Theme URI, if you want you can add your website address to this field.
- The Theme Description, that can be a message and will be shown in the backend of your website.
- The author name, if you want to add any author’s name you can add it here.
- The Author URI, you can add the author’s website address here.
- In the next couple of lines there will be information like “Version, Stable Tags, Requires at Least, Tested Up To, Requires PHP, License, and License URI” and it will not show anywhere so you can leave it as it is.
- Text Domain: This is an important field, the text domain should be the same as the name of the theme.
- Tags: I personally delete these tags, since it shows in the backend and I want the things to look clean.
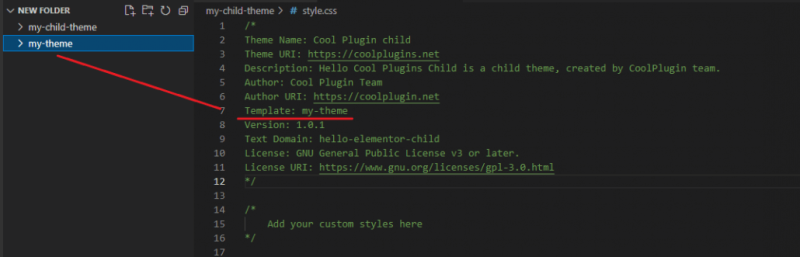
Now, after editing the parent CSS file, let’s edit the child CSS file.
The process is really simple, do the changes as you have done with the parent theme CSS file. Template: Now this is important, this line will connect the parent theme to the child theme, and you have to exactly write the parent’s theme.
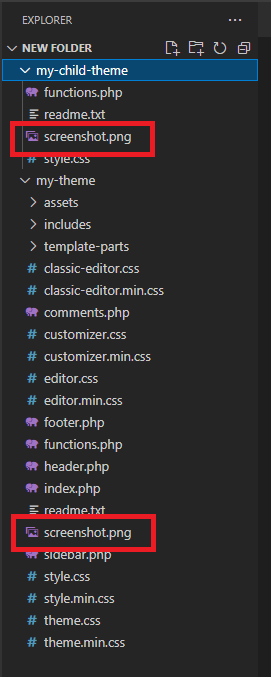
Adding Own image to the hello theme:
An image shows a higher level of branding and customization and you can add a custom image to the theme.
Locate screenshot.png in the directory of both the parent and the child theme and delete them.
Now create your own image and add it to this directory, but the only requirement is:
- Image name should be screenshot.png
- Size of the image 1200px width and 900px height.
See the below reference image for a better understanding.
Now the last and the easy step. ZIP up both the parent and the child theme and upload it to your wordpress website.