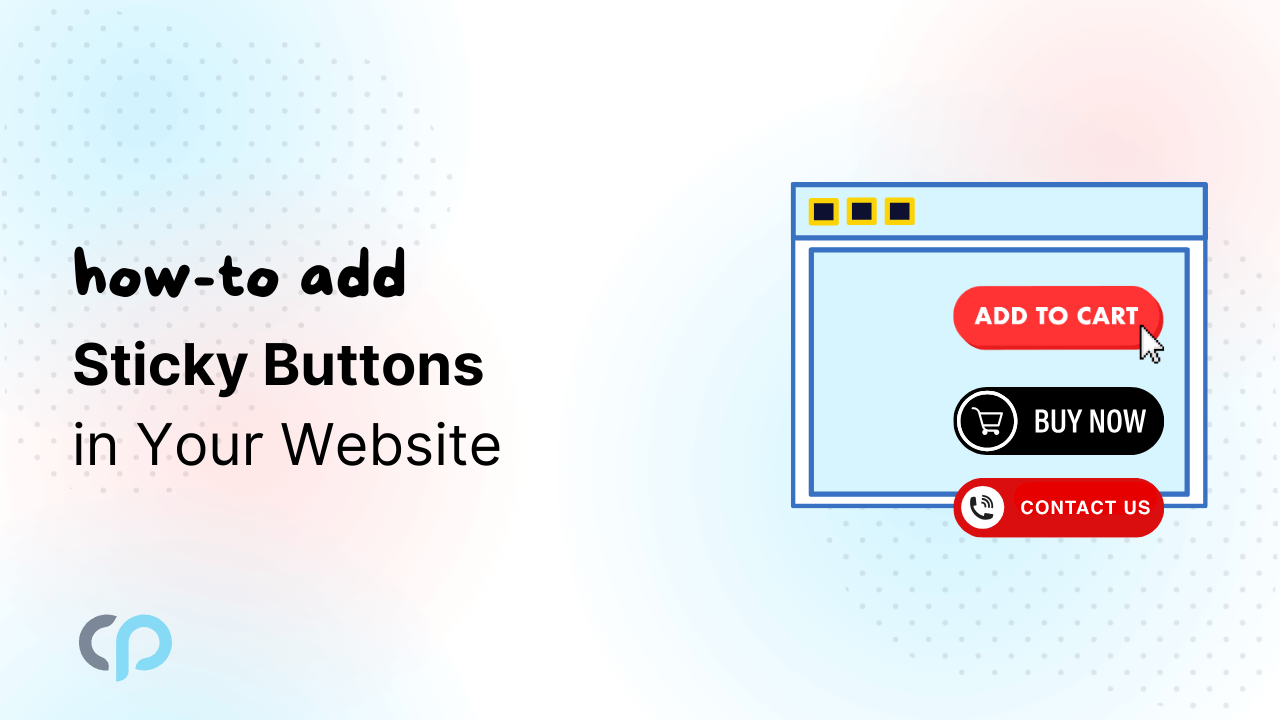
Add Sticky Buttons on Your WordPress Website can be very useful. It makes it easy for the users to get information related to your website. The information included email, phone number, Google map, location, social media links, etc. In this article, I’ll show you how to create sticky buttons on your WordPress website.
These sticky buttons will act as a floating widget. Even if the user scrolls up or down, the position of these buttons will not change because they are fixed. It adds a better experience for the users on your website. The conversions and interactions with the visitors will improve after adding sticky buttons.
Getting Started:
You can add sticky buttons to WordPress using two ways. One way is to build code from scratch and another way is by using a plugin. In this article, I’ll use a plugin. The reason for using a plugin is simple because if we get a plugin that can do our task, then why waste time coding from scratch.
If you want to build a large and complex functionality, then you can build a code. In such cases, plugins might not be useful so it’s better not to depend on plugins. But for small tasks like this (adding sticky buttons), you can use plugins.
WP Sticky is the most efficient plugin used to add sticky buttons. You can add indefinite sticky elements that are compatible with all themes, plugins, and page builders, and the whole procedure can be done in minutes.
The procedure consists of:
- Giving a Name to your element
- Navigating and clicking on the “Pick Element” button
- Choosing the desired element you want to make sticky
- Click on “Save Changes”
Now, the chosen element is sticky on your website. It includes a few customizations so you can play around with the sticky element’s opacity, select the effect, set the scroll range, etc. You can add preferences to suit your website. You can add restrictions if you don’t want to show certain elements on your sticky button.
You can set it to be sticky everywhere or prevent it to get full control over the plugin. You can adjust how it will be displayed on various devices. On the “Devices” tab you’ll be able to select the exact screen size for your sticky elements.
You can pick any element you prefer like a sticky header, sticky menu, widget, navigation, video, etc everything can be adjusted in no time. You can add as many elements as you want.

There are a few other elements that help you to create sticky elements on your website. Install and activate the Smart Floating Action Buttons- Buttonizer plugin. We’ll show you how to use this plugin further.
Add Sticky Buttons on WordPress Website
After installing, go to the Buttonizer dashboard. It does not have a backend settings page. It provides a front-end interface that makes it easier for you to see the impact of changes immediately.
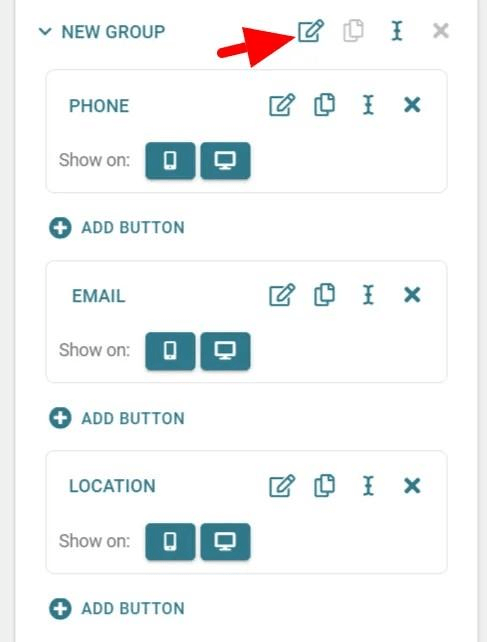
This plugin provides about 25 click actions. Let’s assume you want to add Email, Phone, and Google Map location to your sticky buttons on the website.
Click on “Add Button” and give a name to it.
Here I’ll give the name “Phone” to the Button. Now, you’ll see the Button in the front-end interface.
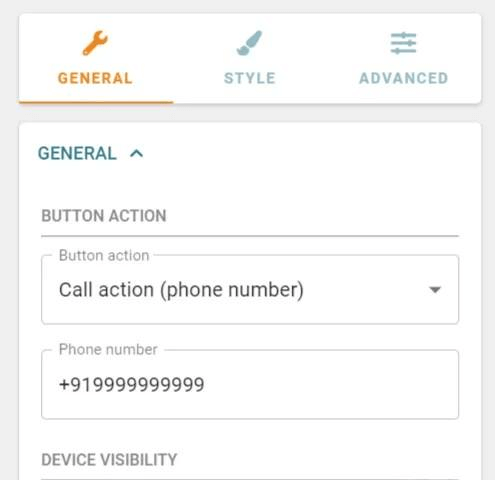
This button is created for phone numbers. To customize it, click on the ‘Settings’ icon next to the ‘PHONE’. A new panel with options will open for customizing the button.
From the ‘Button Action’ dropdown, choose a ‘Call Action’. Now add the phone number to the provided field.
Now, we’ll set a phone icon for this button. Go to STYLE >> ICON section. Click on ‘SELECT ICON’ ,a pop-up will appear. Now select an icon from the Font Awesome library.
You can add as many buttons by following the same process. You have to choose the appropriate ‘Button Action’ for each button. You will get different options for the button.
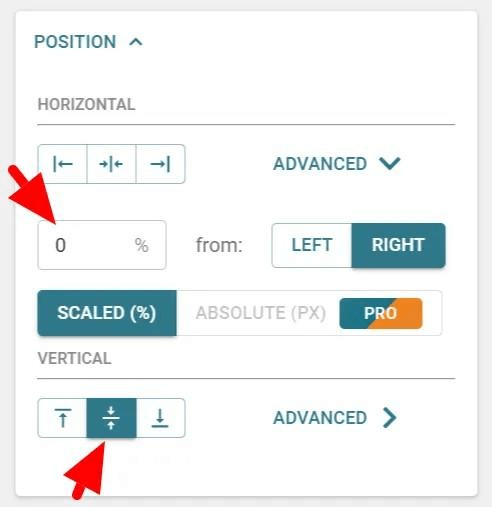
Finally, we have to set a position for the sticky button. To set position click on the ‘Settings’ icon next to the ‘NEW GROUP’.
You can get the option to set position for buttons under the ‘Position’ section. I want to set it on the right side and to the center. So, I set ‘0%’ under the ‘HORIZONTAL’ and the middle part under the ‘VERTICAL’ sections.
Buttonizer plugin provides you with a lot of features that you should try to get familiar with. This plugin gives you an option to choose button color, button animations, backgrounds, custom classes, device visibility, and much more.
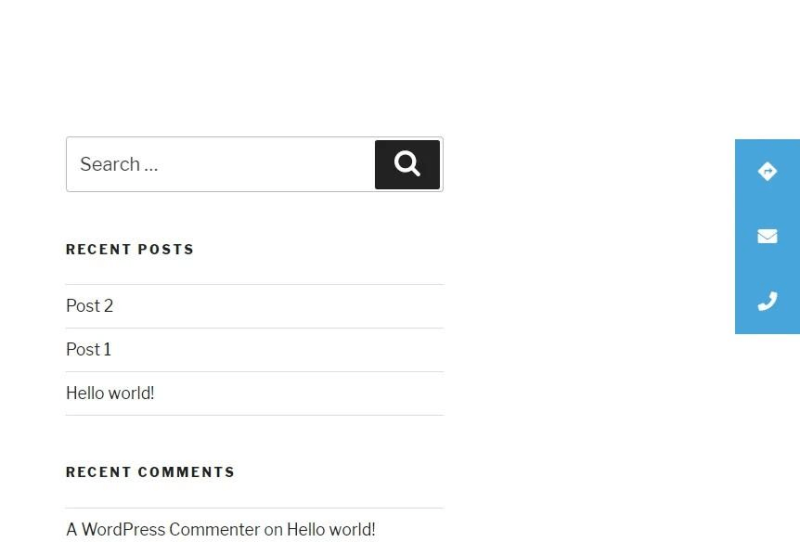
After applying the above settings, your sticky button will look like on the website as the screenshot below.
I hope this article helped you to know about adding sticky buttons on the WordPress website.