If you’re a Divi user, wondering: How do I add a timeline to my website?
Maybe you want to show your company history, display project steps, or create a product roadmap. You know a timeline would be perfect, but Divi doesn’t have a built-in timeline module.
Building timeline using text modules, CSS code, and hiring a developer are expensive and time-consuming. There’s a better way.
Just use the Timeline Module for Divi. The Divi Timeline Module is built to make timelines without any coding. It works just like any other Divi module – drag, drop, and customize.
In today’s blog, you’ll learn how to create a timeline directly inside Divi.
Why Your Website Needs a Timeline
Timelines work great for many things:
- Company Achievements: Highlight your company’s milestones and achievements.
- Historical Timelines: Show historical events or company history.
- Step-by-Step Guides: Visualize processes or tutorials in a timeline format.
- Program Timelines: Display program schedules or phases clearly.
- Event Timelines: Highlight past and upcoming events effectively.
- Job Stories/Personal Milestones: Share job histories or personal achievements.
- Work Experience Timelines: Create timeline sliders of work experience for resumes or portfolios.
- Product Roadmaps: Show product development stages and plans.
- Brand Stories: Tell your brand’s story in an engaging way.
Step-by-Step Guide to Create a Timeline Inside Divi
- First, make sure to install and activate the Timeline Module for Divi.
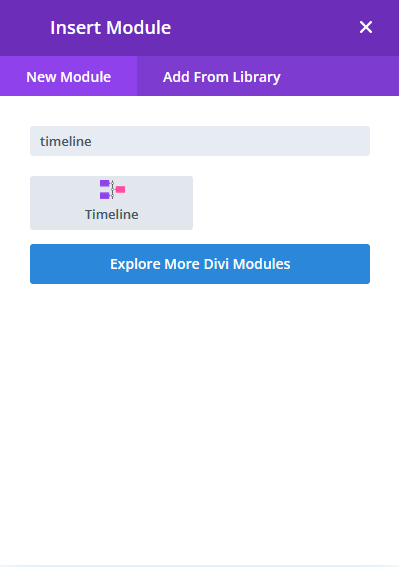
- Open any page with Divi Builder. Click the “+” button to add a module.
- Search for the Timeline Module and add it to your page.
- A Timeline with dummy content will be added to your page. Replace the dummy content with your story. Fill out the details like:
- Story Title: Like “We Started Our Company”
- Description: Something like “In 2010, three friends started this business in a garage…”
- Year: 2010
- Picture or Icon: Add a photo of your first office or pick an icon
- You can fully customize these timeline stories according to your preferences. The Timeline module for Divi comes with three variations of the Vertical timeline:
- both sides
- one side left
- one side right
- To add a new story click on Add New Story button, new timeline will appear, now enter all the required details of timeline story.
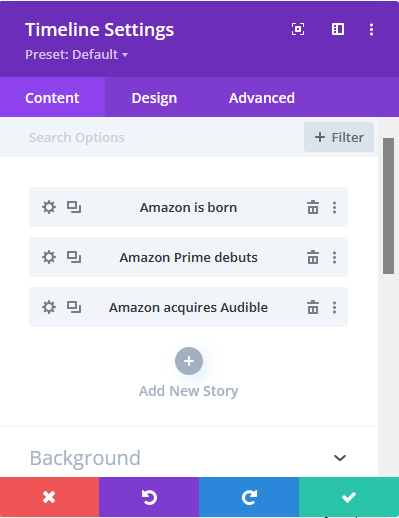
- To edit the existing timeline, click on the settings icon. It will open the settings section for the selected timeline story, You will see four sections for the story.
- Story Content: In this section, you can add or edit your timeline story’s heading and description.
- Story Label: Here, you can add a year label for your timeline stories and also include content for the story label and sublabel.
- Story Media: You can add an image to your story in this section.
- Story Icon: Choose an icon for your story by enabling the icon toggle. By default, it is set to a dot.
- You can now customize your timeline in the Design tab. Changes made here will be applied to the entire timeline. You can adjust layouts and customize your timeline stories.
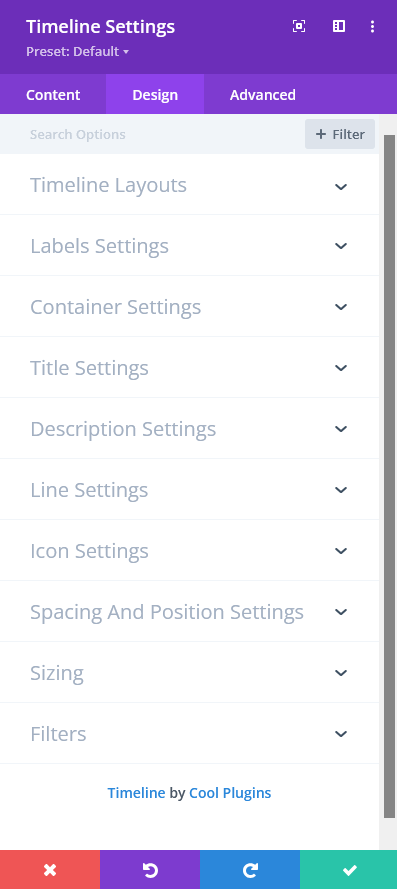
- Click on the Design tab. Inside this tab, you will see many sections for customization. Let’s go through all the sections.
- Timeline Layouts: In this section, you will see a dropdown with layout options. You can change the variations of the vertical timeline, such as both sides, one side left, or one side right.
- Label Settings: Customize all your timeline stories’ labels, including the year label, label, or sublabel. You can adjust colors, size, and font family for your labels.
- Container Settings: This section is for your timeline story box. You can add color, set padding, and apply different types of borders with colors.
- Title Settings: This section is for your timeline story title. Adjust color and font-related properties here.
- Description Settings: To edit your timeline story description, use this section. Customize the description text, set color, font family, and adjust line height.
- Line Settings: Customize the middle line of your timeline. Add an initial color and an on-scroll effect by clicking on the Show Line Filling option and setting the color for scrolling.
- Icon Settings: Add color to your selected icons. You can adjust the fill color and background color as desired.
- Spacing and Position Settings: Set the positions of your timeline story icons, labels, and the gaps above and below your timeline stories from this section.
Pro Tips for Better Timelines
- Keep it simple – Don’t add every single event. Pick the most important ones.
- Use good photos – Pictures tell stories better than words. Add team photos, office shots, or product images.
- Be consistent – Use the same style for all your stories so it looks professional.
- Tell a story – Connect your milestones. Show how each event led to the next.
FAQs
Can I add images and icons to my timeline stories?
Yes! You can add photos, choose icons, or even use both. For example, you can upload your office photo or use an icon like a star or a flag.
Can I style each timeline story differently?
Yes, you can. Each story has its own design settings. For example, you can give every story a different color or icon to make it unique.
Does Divi have a built-in timeline module?
No, Divi doesn’t come with a timeline module by default. To add a timeline, you need to use a third-party plugin like Timeline Module for Divi.
Can I add more than one timeline on a page?
Yes, you can add multiple timelines to the same page. For example, one for your company history and another for your product roadmap.