Flip boxes are a great way to showcase content in an interactive and visually appealing way. With the Cool Flipbox WordPress plugin, you can easily create stunning flip boxes that turn around when you hover over them and show more information on the back. They are ideal for showcasing your team, services, features, or anything else. This blog will guide you through how to install Cool Flipbox and use it on your website.
Features of Cool Flipbox
With the Cool Flipbox plugin, you get full control over how your flip boxes look and work. Here are some key features you can use:
- Match your website’s design by choosing your own color scheme.
- Add icons using Font Awesome to make your content more visual.
- Customize both sides of the flip box: add your own title, description, and style.
- Use images, icons, and buttons to make each flip box more engaging.
- Easily re-order the flip boxes with drag-and-drop control.
- Choose how many columns of flip boxes you want to show in each row.
- Create unlimited flip boxes — there’s no limit to how many you can add.
- Add clickable links to each flip box so visitors can explore more details.
How to Install Cool Flipbox Plugin
Method 1: Upload via WordPress Admin
- Download the plugin from WordPress.org.
- Log in to your WordPress Admin.
- Go to Plugins > Add New > Upload.
- Upload the flip-boxes.zip file.
- Click Install Now, then Activate the plugin.
Method 2: Install via WordPress Admin Search
- Go to Plugins > Add New.
- Search for “Cool Flipbox“.
- Click Install Now and then Activate.
How to Add Flipboxes on Your Site
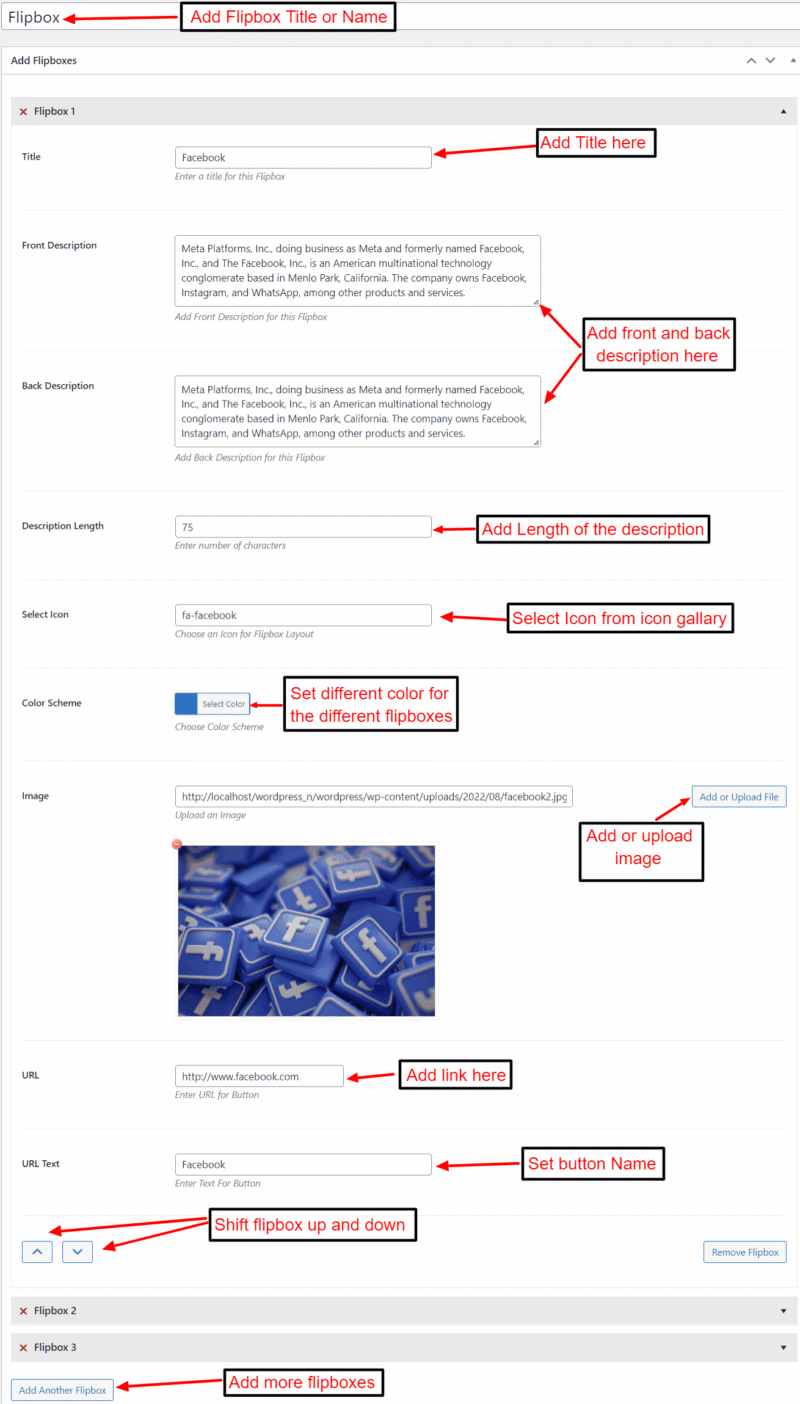
Once the plugin is installed and activated, you can start adding flipboxes directly from your WordPress dashboard. Simply navigate to Cool Flipbox in the left-hand menu and click on Add New Flipbox to begin. The image below highlights all the settings and customization options available for your flipbox.
You can also customize how your flipboxes look and behave by visiting the Flipboxes Settings panel.
Flipbox Settings
General Settings:
- Flipbox Layout: Choose from 9 unique styles.
- Flipbox Effect: Set the flip animation direction, from Bottom to Top or Left to Right.
- Number of Columns: Display between 1 to 6 flipboxes per row.
- Skin Color: Customize the color scheme of your flipboxes.
- Height: Choose between Auto Height (based on content) or Equal Height for consistent box sizes.
Advanced Settings:
- Number of Flipboxes: Define how many boxes to show in total.
- Icon Size: Adjust the icon size inside each flipbox.
- Read More in the Same Tab: Enable this option if you want links to open in the same tab instead of a new one.
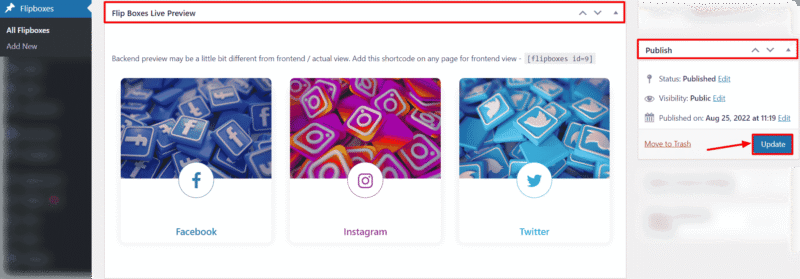
After adding, click Publish or Update to save the changes. You can then view your flipboxes in the Flip Boxes Live Preview section.
How to Add a Flipbox Using a Shortcode
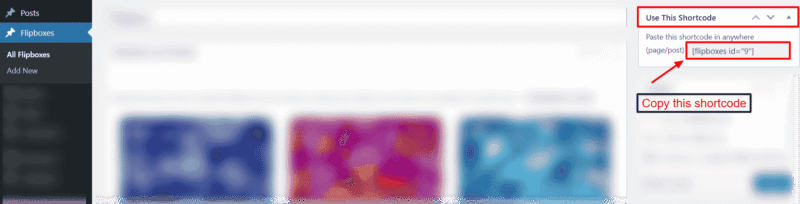
On the right side of the flipbox page, you’ll see a “Use This Shortcode” box.
Copy the shortcode and paste it into any page or post where you want the flipboxes to appear.
Using the Shortcode in Different Editors:
- Classic Editor:
- Go to Pages > Add New or open an existing page.
- Paste the shortcode into the content area, then click Publish.
- Go to Pages > Add New or open an existing page.
- Elementor:
- Open the page with Elementor.
- Drag in a Shortcode widget and paste the shortcode inside it.
- Open the page with Elementor.
- Gutenberg (Block Editor):
- Open your page or post in the block editor.
- Add a Shortcode block, paste the shortcode, and then click Update or Preview to see it live.
- Open your page or post in the block editor.
Read More
Explore more helpful guides to improve your WordPress website: