Advanced Custom Fields (ACF) is a plugin that lets you add extra information to your posts. One of ACF’s special tools is called a Repeater Field, using which you can add rows of similar information like product specifications, car features, or step-by-step instructions.
Are you also looking for a way to display it inside Elementor’s Loop Grid?
Well, Elementor Pro allows you to build custom post layouts (like blog cards, product grids, portfolios, etc.) using the Loop grid. You can design how each card looks using a Loop Item Template, which is great! but here’s the problem: Elementor Pro does not have a built-in way to display ACF Repeater Fields inside these loop templates.
That’s where the Loop Grid Extender plugin comes in; it fills this gap and lets you display repeater fields easily inside Elementor.
What Is Loop Grid Extender?
Loop Grid Extender for Elementor Pro is a free WordPress plugin that adds advanced dynamic content features to Elementor’s Loop Grid system.
It is built specifically for people using Elementor Pro + ACF (Advanced Custom Fields), especially when they want to display ACF Repeater Fields inside loop templates.
Think of it as a missing piece that gives Elementor Pro superpowers when working with repeater fields and dynamic layouts. Here are some key features of this plugin:
- Displays ACF Repeater Fields Inside Loop Items without coding.
- Enables Nested Loops Inside Loop Templates
- Filter posts or products by categories, tags, or custom t
- axonomies using dropdown menus.
Now, follow these simple steps to easily display ACF repeater fields inside Elementor’s Loop Grid.
How to display ACF repeater fields inside Loop Grids
- Make sure you have installed and activated Elementor Pro, ACF Pro, and Loop Grid Extender for Elementor Pro.
Step 1: Create a Repeater Field
- In your WordPress dashboard, go to Custom Fields > Add New.
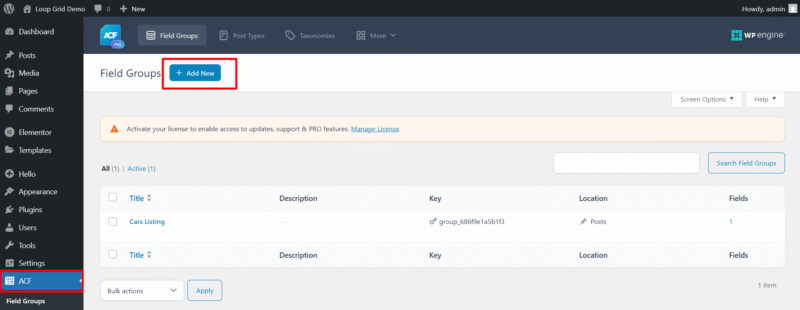
- Create a Field Group and add a Repeater Field inside it.
- In Location Rules, choose where this field group should appear (for example, on Posts or a custom post type).
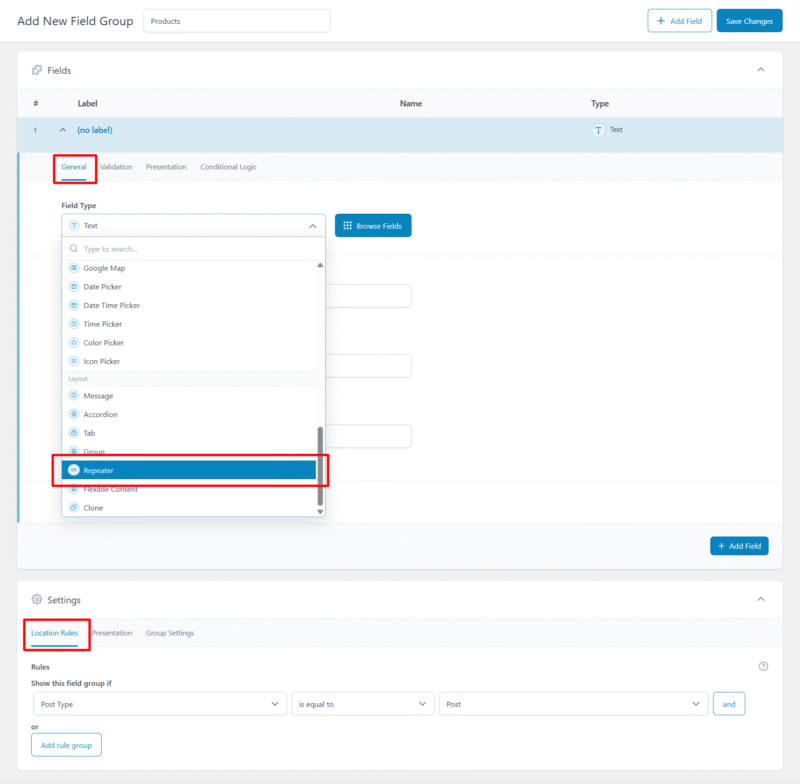
- Click Save Changes.
Step 2: Add Content to the Repeater Field
- Open any post or create a new one.
- Scroll down to see your repeater field.
- Click Add Row and fill in the details.
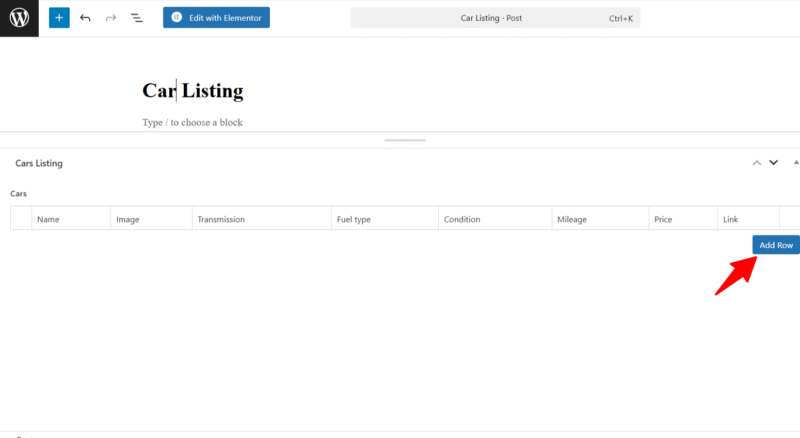
- Add as many rows as you need.
- Click Update to save the post.
Step 3: Design a Loop Item Template
- In your WordPress dashboard sidebar, navigate to Templates > Add New.
- Next, you have to select the type of template you want to create. In the dropdown, select Loop Item.
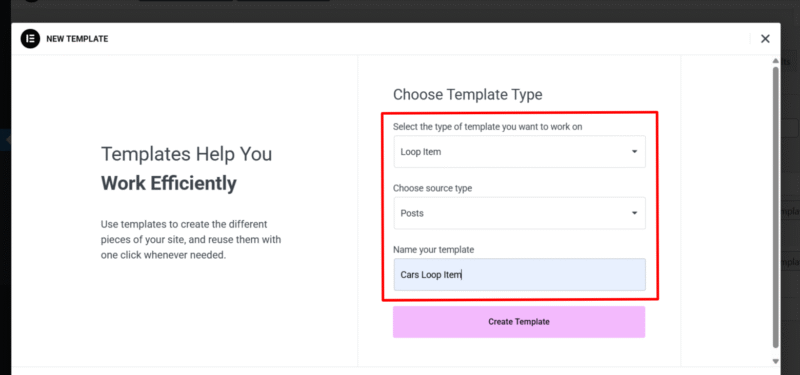
- From the Source type, select post.
- Enter the template name and click “Create Template”.
Inside Elementor:
- Add widgets like Heading, Image, or Icon List.
- For each widget, click the Dynamic Tags icon (the database symbol).
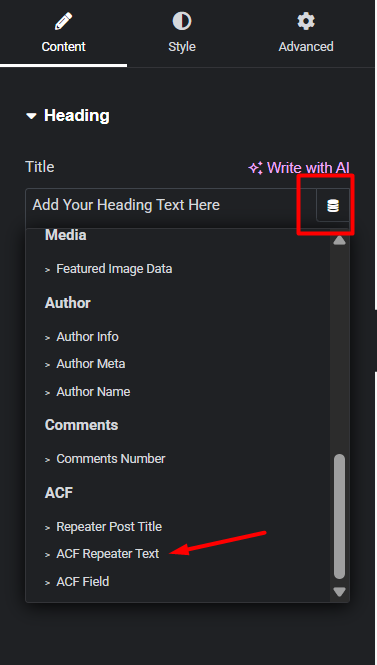
- Select the ACF Repeater option that matches your field type (e.g., text or image).
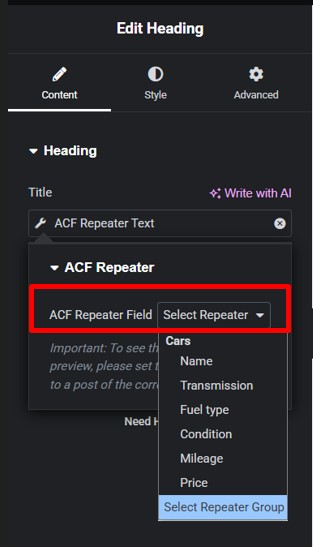
- Choose which sub-field you want to display.
- Style the template as you like, then click Publish.
Step 4: Create the Loop Grid
- Go to Pages > Add New.
- Create a page and click Edit with Elementor.
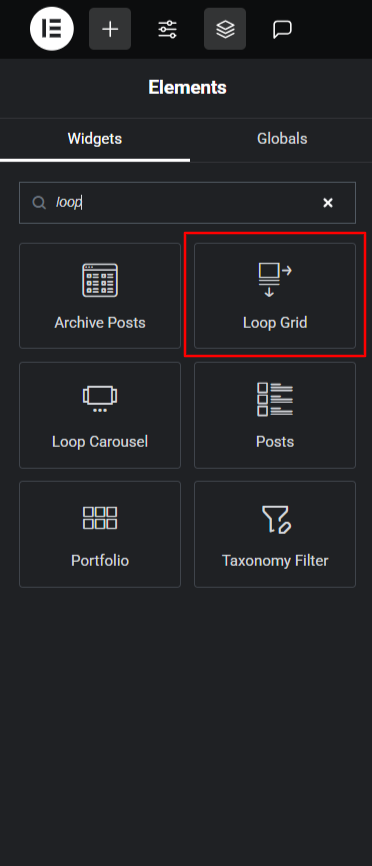
- Drag in the Loop Grid widget.
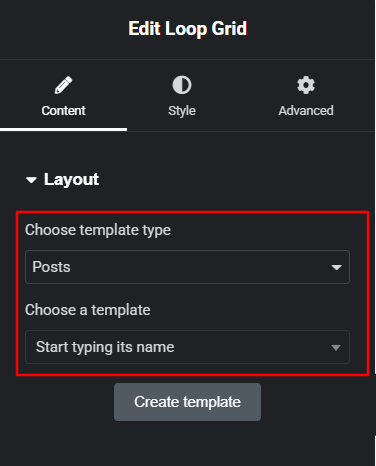
- In settings:
- Template Type: Post
- Choose the Loop Item template you just created.
- Adjust layout options (columns, pagination, etc.).
- In the Loop Grid settings, open the Query Control panel.
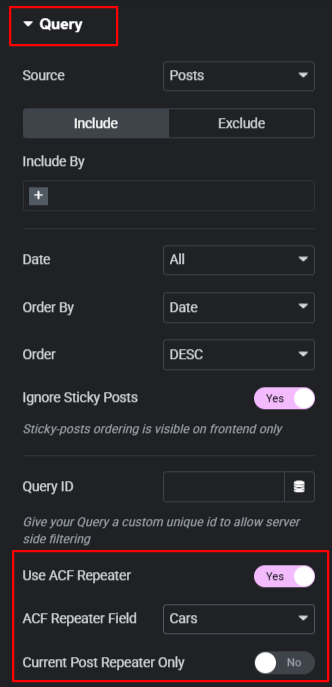
- Toggle Use ACF Repeater to ON.
- Select your repeater field from the dropdown.
Decide whether you want to show repeater data only from the current post or from all posts
- Keep Current Post Repeater Only: ON
- Keep Current Post Repeater Only: OFF
- After being satisfied with all the changes, click Publish.
With the combination of Advanced Custom Fields, Elementor Pro, and the Loop Grid Extender plugin, you don’t have to struggle with complicated code or messy workarounds anymore. Ready to give it a try?
Install the plugin, set up your repeater fields, and design beautiful grids that display all your content exactly the way you want inside Elementor.
FAQs
Can I use this with the free versions of Elementor and ACF?
No, this specific functionality requires the Pro versions. Free Elementor doesn’t include the Loop Grid widget, and free ACF doesn’t support repeater fields.
Can I display multiple repeater fields in one loop item?
Yes, you can add multiple ACF repeater fields to a single loop item template. Simply add more widgets and connect each one to different repeater fields using dynamic tags.
Is it possible to limit the number of repeater rows displayed?
No, you can’t control the limit number of repeater rows, if there are 10 repeater fields, then 10 repeater rows will display, we can’t limit it.
Can I show category counts and use dropdown filters with the Loop Grid Extender for Elementor Pro?
Yes, the Loop Grid Extender allows you to display category counts and adds a dropdown option to the taxonomy filter, making it easier to filter posts or products by categories or terms.