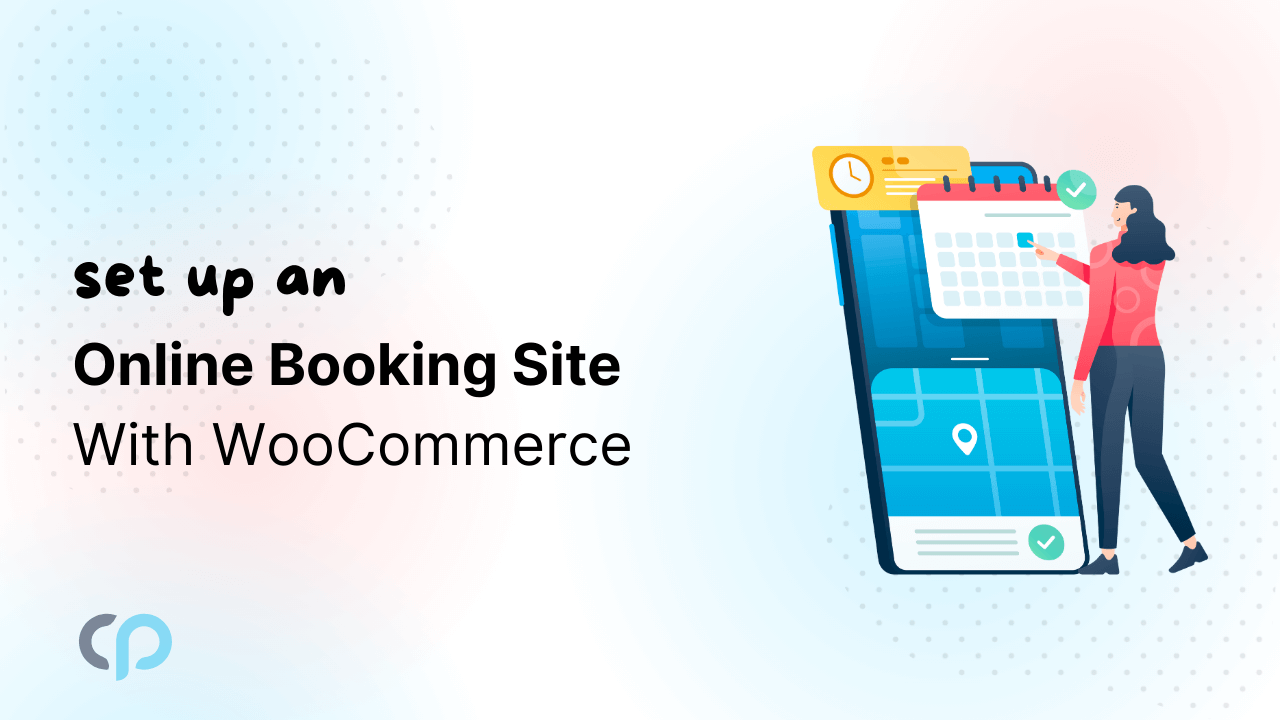
Introduction
Did you know that 70% of customers prefer online booking over phone calls? In today’s fast-paced world, businesses that offer seamless booking experiences gain a competitive edge. Whether you run a salon, hotel, private training studio, or medical clinic, an easy online booking system enhances customer experience and streamlines operations.
With the PluginHive WooCommerce Bookings and Appointments plugin, your store gets a powerful and flexible solution, allowing it to develop a hassle-free WooCommerce booking system. This article will guide you through every step required to build a professional WooCommerce Booking Website.
Essential Components to Set Up a Booking Website
Before going further, let’s quickly check the requirements for making a successful WooCommerce booking system.
1. Domain and Web Hosting
The domain name and hosting are the foundations of any website, making them crucial elements to get right. Before purchasing a domain, keep the following points in mind:
- Choose a name that is short, relevant, and easy to remember.
- Select a hosting provider with strong uptime, security, and WooCommerce compatibility.
- Opt for a hosting plan optimized for WordPress and WooCommerce, such as those from Bluehost, Hostinger, SiteGround, or WP Engine.
2. WordPress Installation
WordPress is a powerful Content Management System (CMS) that makes website setup quick and easy. Most hosting providers offer a one-click installation feature, allowing you to install WordPress directly from your hosting control panel without any technical hassle. Navigate to your hosting control panel, find the WordPress installer, and follow the setup instructions.
3. Choosing a Booking-Friendly WordPress Theme
A well-designed theme can positively affect user experience and functionality. Look for features like
- The theme should be fully compatible with WooCommerce and popular booking plugins to avoid conflicts and ensure smooth functionality
- Mobile responsiveness so that users can book from any device
- Compatibility with WooCommerce for smooth transactions
Some recommended WooCommerce themes include Astra and Storefront, which have built-in support for Bookings businesses.
4. WooCommerce Installation and Setup
On your WordPress dashboard, go to Plugins > Add New and search for WooCommerce. Install and activate the plugin. Configure core settings like currency, location, and payment methods to align with your WooCommerce booking system.
5. SSL Certificate
Security comes first when it comes to online transactions. An SSL certificate ensures encrypted data transmission and serves to build customer trust in your WooCommerce booking system. Most hosting platforms grant activation of free SSL certificates through their hosting panel.
Setting Up Bookings with PluginHive WooCommerce Bookings and Appointments
Once the basic setup is complete, you can start configuring the PluginHive WooCommerce Bookings and Appointments plugin to manage your bookings efficiently.
1. Installing and Activating the Plugin
To get started, download the WooCommerce Bookings and Appointments plugin from PluginHive. Then, log in to your WordPress Admin panel, navigate to Plugins > Add New, and upload the plugin file. Click Install and then Activate.
After activation, you’ll receive an email with your license key. To activate the plugin, go to Bookings > Settings > License, enter your API License Key and Product ID, and click Activate.
For more details, check out the Installation and Activation Guide.
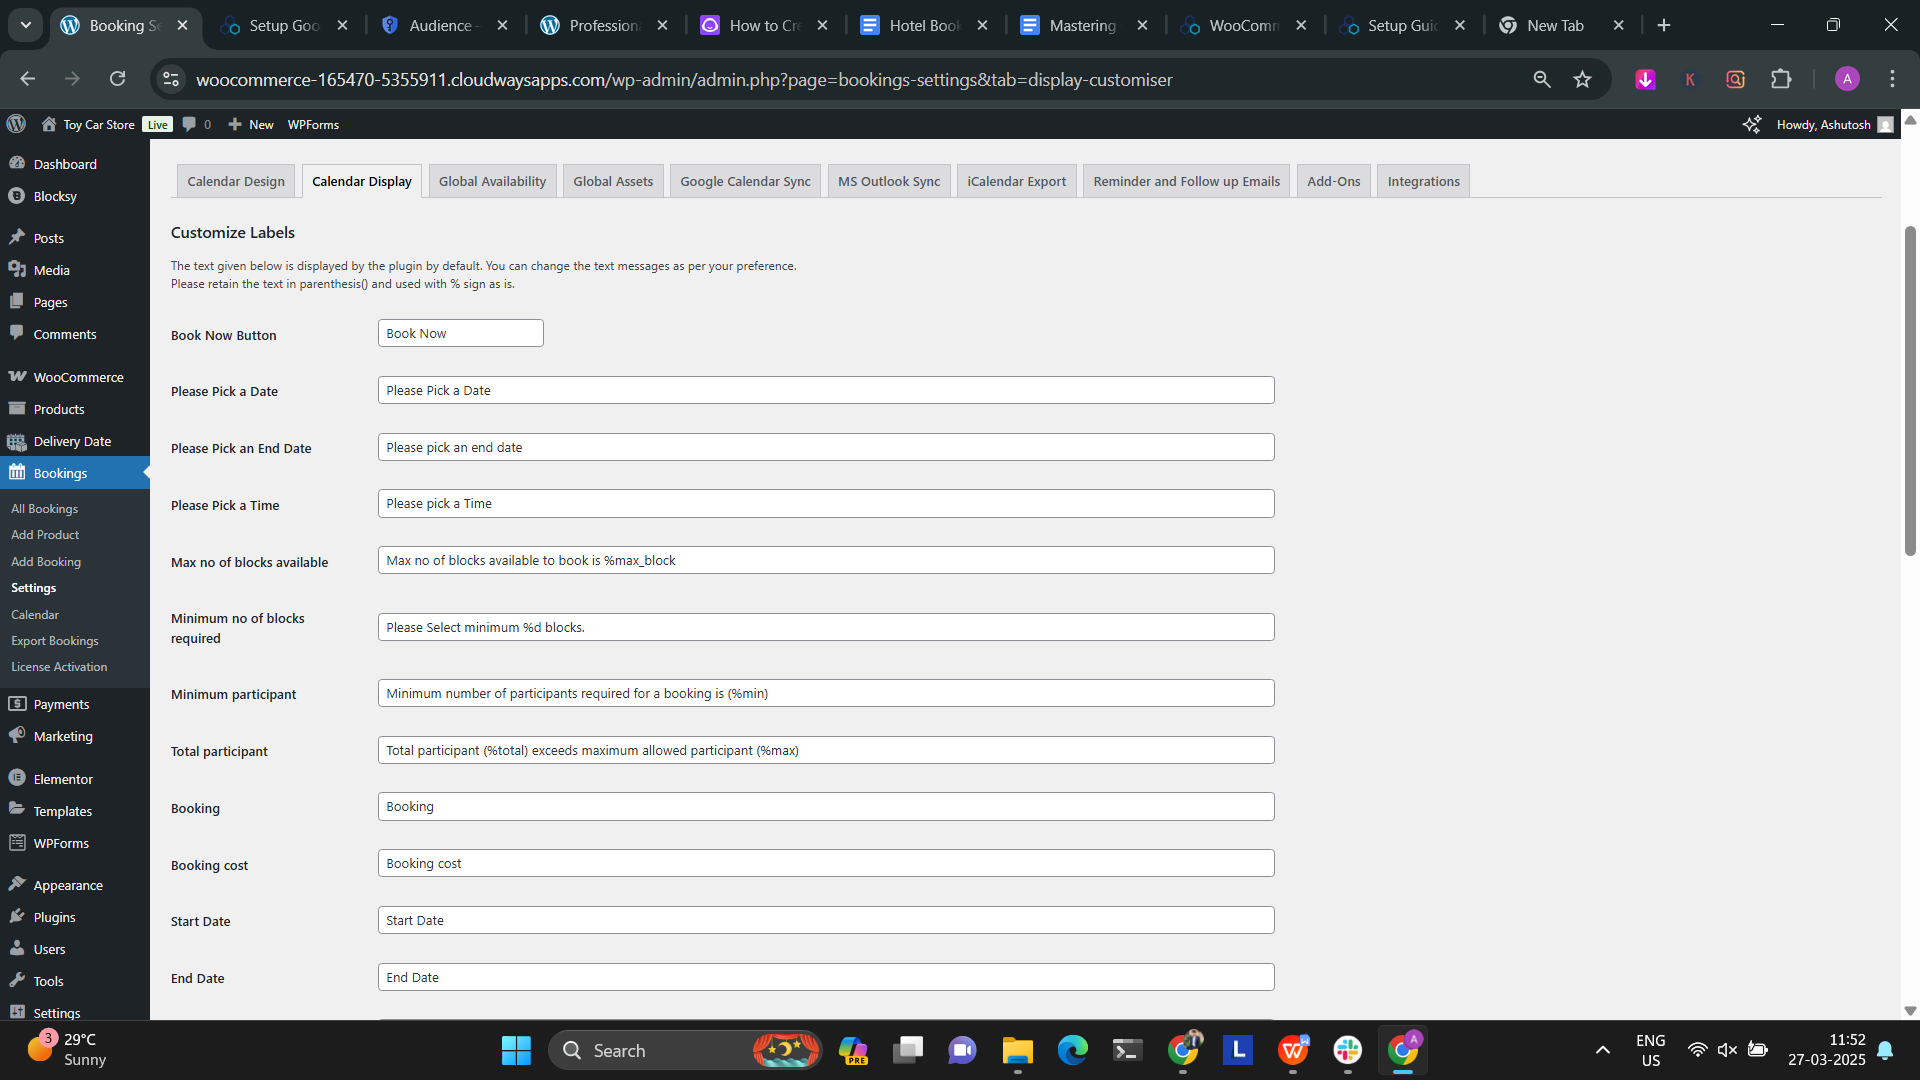
2. Configuring General Plugin Settings
Configuring the general settings of the plugin helps tailor the booking experience to match your website’s design and user preferences. From calendar templates to display settings, you can customize various aspects of the booking system for a seamless booking process.
- Choose a Calendar Design
The plugin offers three calendar templates.
Change the design under Bookings > Settings > Calendar Design, and customize colors to match your website.

- Personalize Labels & Messages
Modify booking labels and messages under Bookings > Settings > Calendar Display to align with your website’s tone and improve user experience.
- Adjust Calendar Display Settings
Set the week to start on Monday or Sunday, enable the Month Picker for easier navigation, and activate Time Zone Conversion to display local time slots.
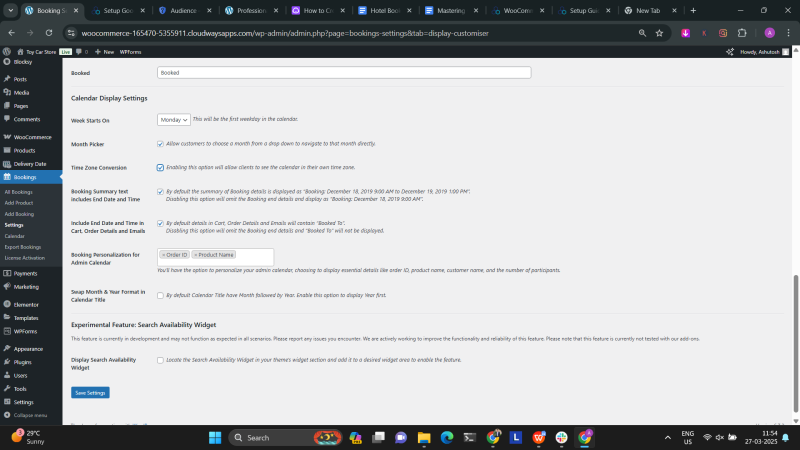
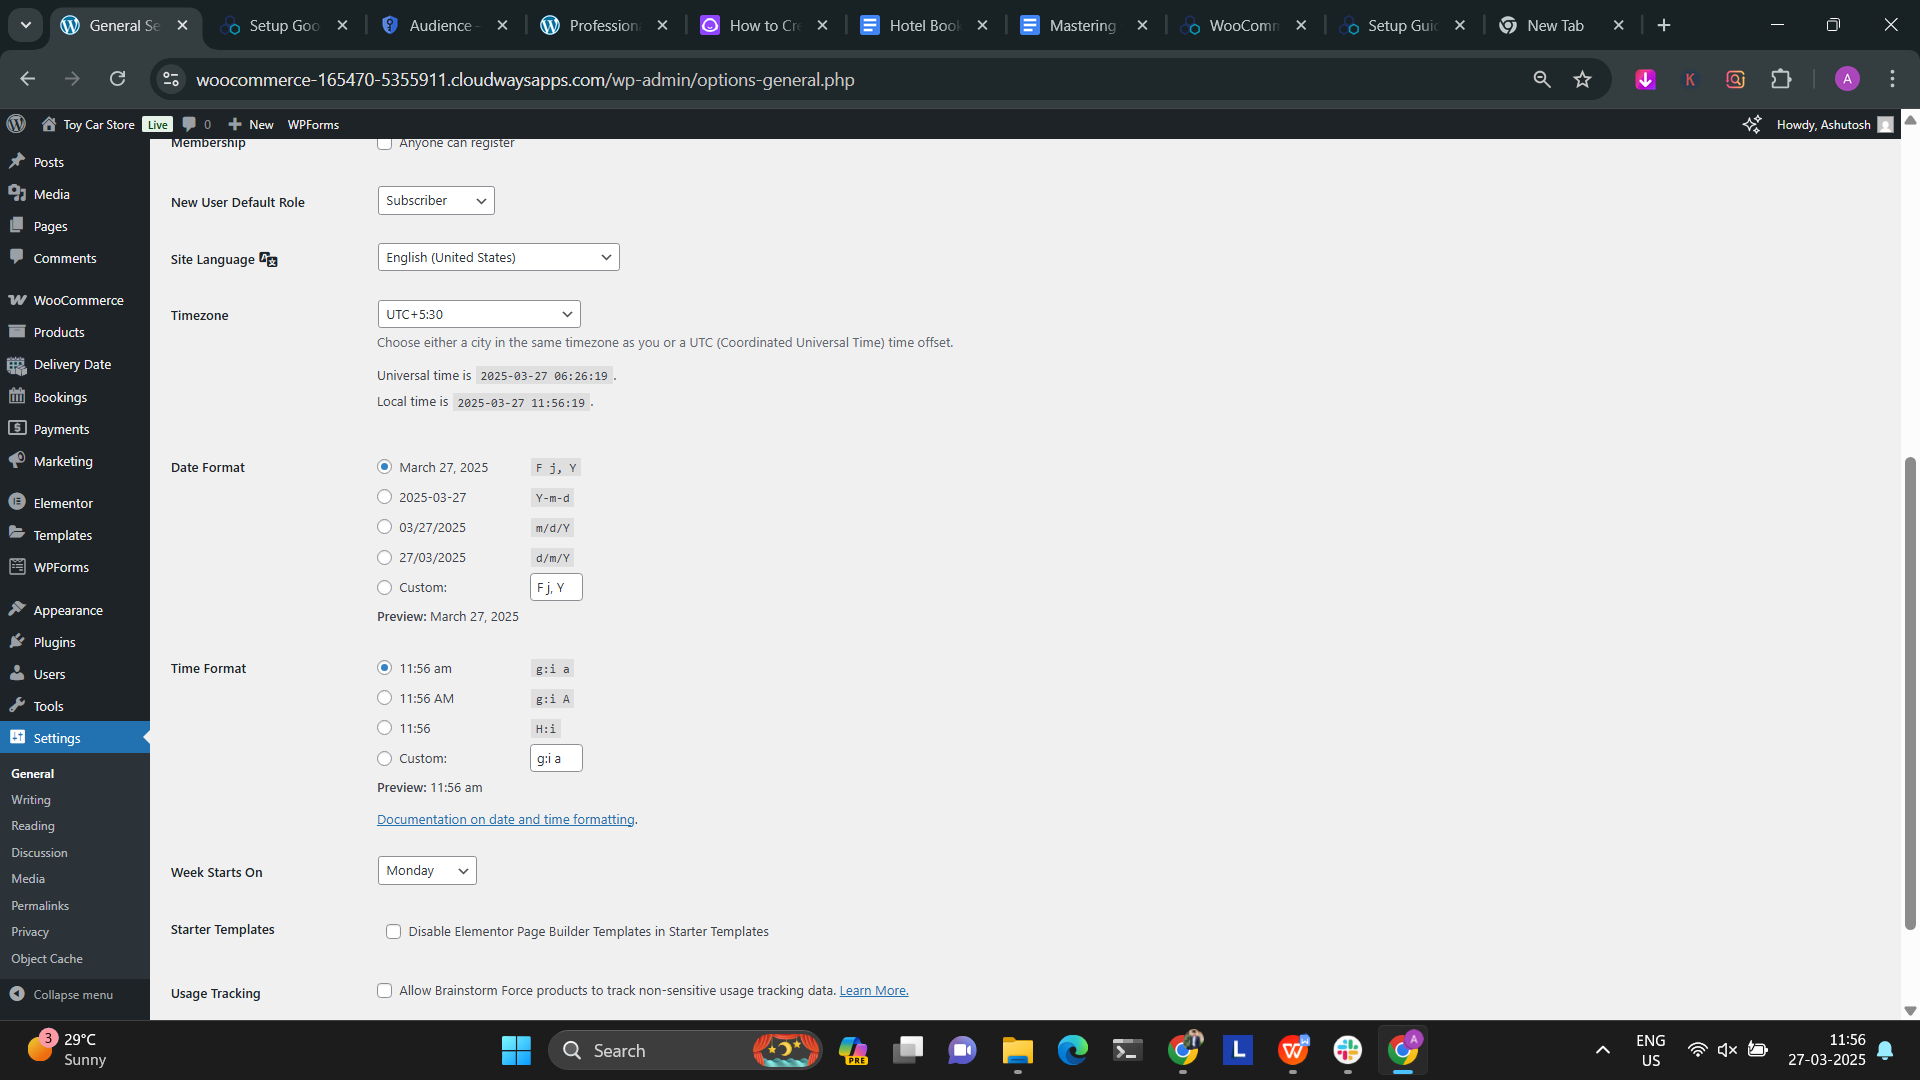
- Set Date & Time Format
The plugin follows your WordPress settings. To change them, go to Settings > General > Date and Time Format and select your preferred format.
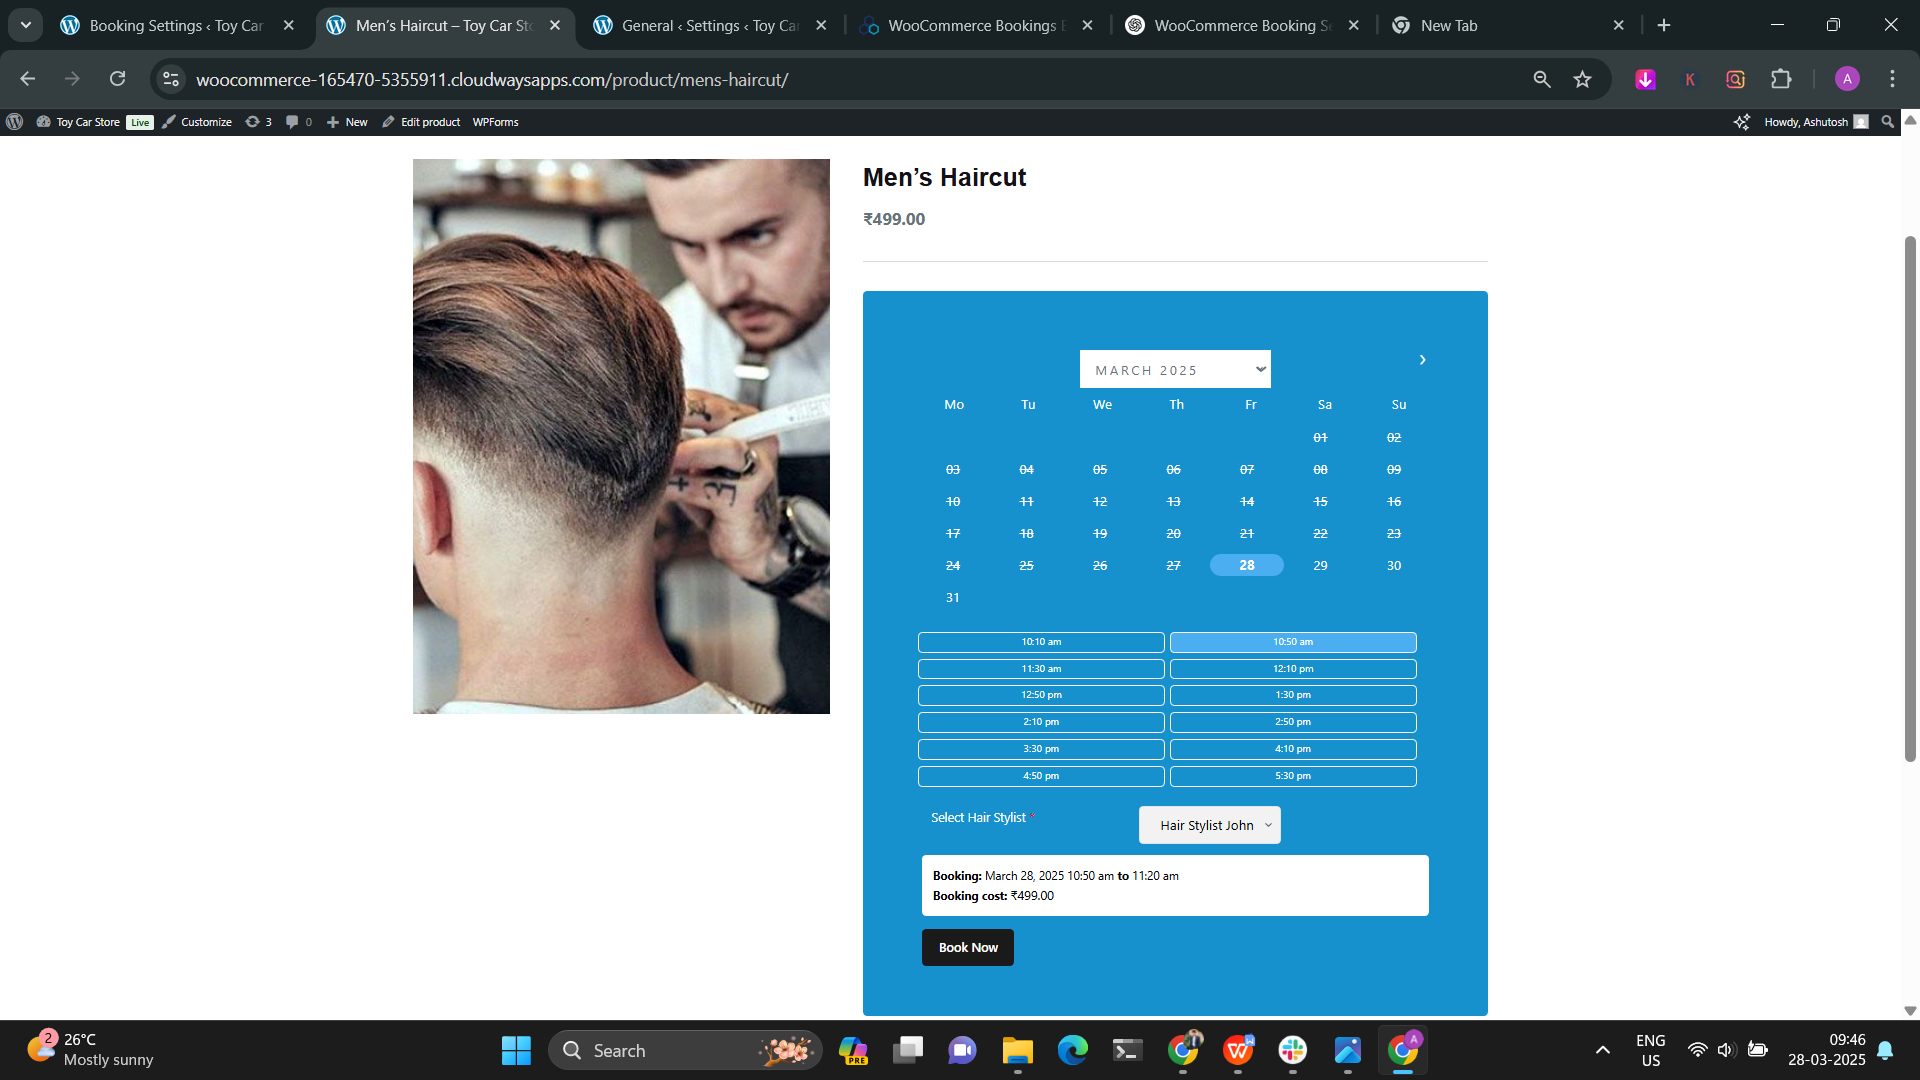
3. Adding a Bookable Product (Haircut Service)
3.1. Create a New Bookable Product
- Go to Products > Add New Product.
- Enter the product name and description.
- In the Product Data section, select Bookable Product and check the Virtual option.
3.2. Set Booking Availability
- Under Bookings, use the Booking Period option to set the block time (e.g., 30 minutes for a salon appointment).
- Enable Buffer Time if needed (e.g., 10 minutes for cleaning before the next booking).
- Define daily booking times by setting the first and last available slots (e.g., 10 AM to 6 PM).

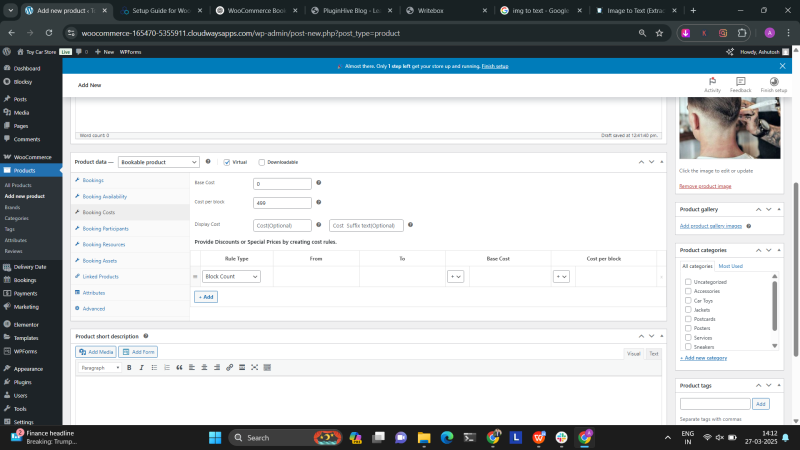
3.3. Configure Booking Costs
- Under Booking Costs, set the Base Cost (e.g., ₹0 for a salon).
- Define the Cost per Block (e.g., ₹499 per 30-minute slot).
- Configure pricing rules based on date ranges, months, days, or specific time slots.
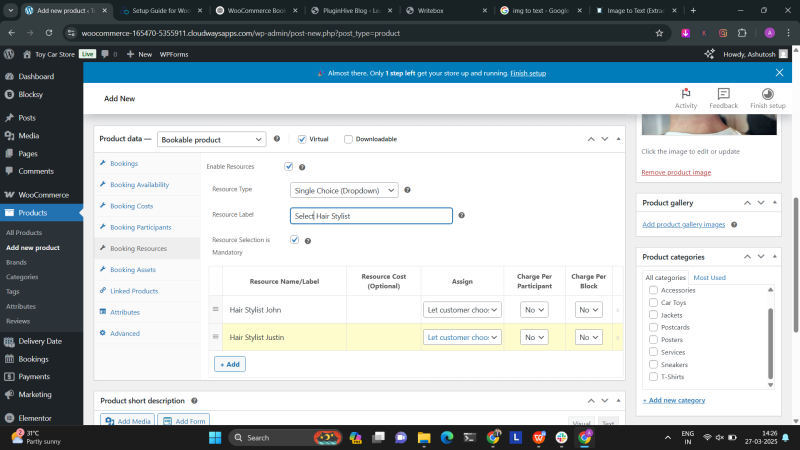
4. Resource Management
Resource management in WooCommerce Bookings and Appointments allows businesses to assign limited resources (like staff, equipment, or rooms) to bookable products. This ensures that bookings don’t exceed availability.
For example, if we want to add two hairstylists named John and Justin,
- Go to Booking Resources and enable the Resources option.
- Set the Resource Label to “Select Hair Stylist” to let customers pick their preferred stylist. (for example, add two resources named “Hair Stylist – John” and “Hair Stylist – Justin”).
- You can configure these resources based on your booking requirements, such as availability, pricing, or staff schedules.
5. Payment Gateway Integration
To ensure WooCommerce payment gateways work correctly, navigate to WooCommerce > Settings > Payments in your WordPress dashboard. Enable your preferred gateway (e.g., PayPal, Stripe, or Razorpay) and enter the necessary API credentials.
6. Enhancing the Booking Experience
This plugin also helps in simplifying scheduling and boosting efficiency with calendar sync and automated emails.
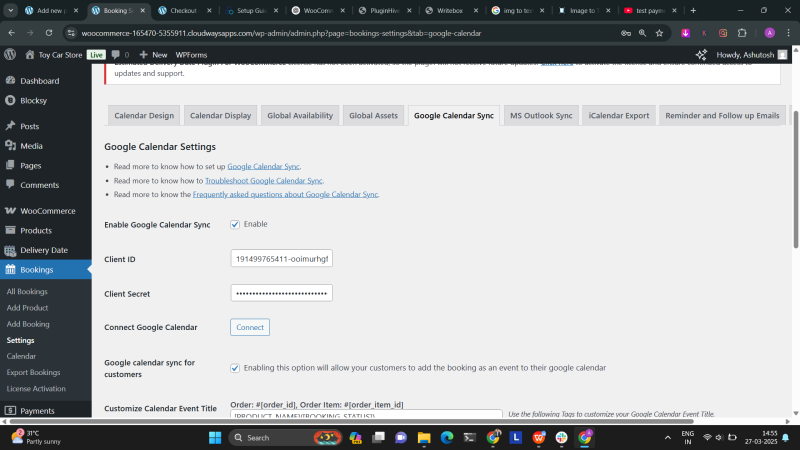
- Syncing WooCommerce Appointments with Calendar Apps
The PluginHive WooCommerce Bookings and Appointments plugin supports seamless integration with Google Calendar, Outlook, and Apple iCal. This allows you to automatically sync your WooCommerce appointments with your preferred calendar application.
For Google Calendar Sync, you’ll need a Client ID and Client Secret Key, which you can obtain by following the guide on How to Set Up Google Calendar Sync.
Setting up the email notifications:
To set up email notifications, go to Bookings > Settings > Reminder & Follow-up Email. Note: Default emails such as New Booking Order Emails, Booking Cancellation Emails, and Booking Approval Emails are sent automatically when applicable—no configuration is required.
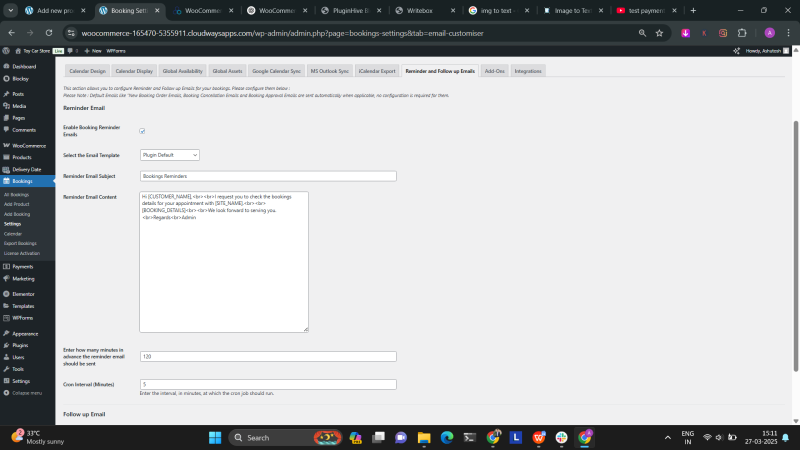
Enable the Booking Reminder Email option, select a template, and customize it as needed. You can also set the time in minutes before the reminder should be sent (e.g., 120 minutes for a 2-hour advance reminder). Additionally, you can enable Follow-up Emails, customize them, and schedule them based on your requirements.
To ensure your WooCommerce booking system works correctly, start by making a test booking as a customer. Go through the entire process, including selecting a service, choosing a time slot, and completing payment. Verify that the booking appears in WooCommerce orders and syncs with Google Calendar.
Advanced Plugin Features and Customization
- Flexible booking options: It lets customers book hourly, daily, or multiple-day slots with set minimum and maximum durations. Businesses can offer single or group bookings while customizing lead times to prevent last-minute reservations. For example, a personal trainer may allow clients to choose between a 1-hour, 2-hour, or full-day session based on their schedule.
- Custom Pricing and Discounts: You can set different prices based on peak or off-peak hours, offer discounts for early bookings or long-duration appointments, and charge extra for additional services. Seasonal pricing strategies can also be applied. For example, A resort increases room rates during the holiday season while offering discounts for off-season stays
- Multi-Language & Multi-Currency Support: Supports multiple currencies and languages, allowing businesses to customize booking details based on location. This improves accessibility and enhances the experience for international users. For example, A yoga retreat in Bali offers booking options in English, Spanish, and French with currency conversion for seamless transactions.
- Individual or Group Bookings: Allows customers to book for themselves or as a group. Businesses can set group size limits based on availability and offer discounts for larger bookings. For example, A yoga instructor enables group sessions for up to 10 people with a 10% discount for groups of five or more.
- Booking Search Availability: Customers can check available slots in real time, ensuring they only see open time slots. This optimizes the booking experience and prevents scheduling conflicts. For example, A hotel website allows guests to see available rooms and book instantly without calling reception.
- Create Bookings Manually: Admins can manually add bookings from the dashboard, modify or cancel reservations on behalf of customers, and efficiently manage walk-in bookings.For example, A salon receptionist manually books an appointment for a walk-in customer and adjusts the schedule accordingly.
Seamless Integration with Other PluginHive Plugins:
You can also customize your WooCommerce booking system by combining WooCommerce Bookings and Appointments with other PluginHive plugins, offering tailored solutions to meet your unique business needs.
- Pluginhive WooCommerce Multiple Non-Adjacent Plugin: Allows customers to book random time and day slots with the help of the WooCommerce Bookings and Appointment plugin. For example, A photography studio lets clients book multiple non-adjacent time slots for different sessions, such as a morning shoot on Monday and an evening shoot on Friday.
- Recurring Bookings and Appointments for WooCommerce: Allows customers
to schedule recurring bookings with the help of the WooCommerce Bookings and Appointments plugin. For example, A fitness trainer offers weekly workout sessions, allowing clients to book recurring appointments every Monday and Thursday automatically. - PluginHive Dokan Booking Integration for WooCommerce: Allows multiple sellers or service providers to manage their own bookings. For example, A marketplace for home services enables different professionals, like plumbers, electricians, and cleaners, to manage their availability and accept bookings independently.
- PluginHive WooCommerce Deposits Plugin: Enables customers to pay a deposit for services and settle the balance later. For example, A hotel allows guests to reserve a room by paying 30% upfront and settling the remaining amount upon check-in
- PluginHIve Product Addons Plugin: Let customers personalize their purchases by adding custom fields like text boxes and dropdowns. For example, A bakery offers customized cakes where customers can select flavors, add a message, and choose decoration styles before placing an order.
Conclusion
Setting up an online booking website with WooCommerce is simple by following the outlined steps. By securing a domain, installing WordPress and WooCommerce, and integrating PluginHive WooCommerce Bookings and Appointments, you can create a seamless Woocommerce booking system. This plugin offers features like calendar integration, flexible pricing, and automated reminders to enhance customer experience and streamline operations. Now, implement these steps and start accepting bookings. Visit PluginHive WooCommerce Bookings and Appointments page and start your online booking journey today!
FAQs
Can you use WooCommerce as a booking system?
Yes, WooCommerce can be used as a booking system by integrating a plugin like PluginHive WooCommerce Bookings and Appointments, which allows businesses to manage appointments, reservations, and scheduling.
How to add appointment booking in WordPress?
You can add appointment booking in WordPress by installing a booking plugin like PluginHive WooCommerce Bookings and Appointments, configuring your services, and enabling booking options on your site.
How to install WooCommerce bookings?
To install WooCommerce Bookings, navigate to Plugins > Add New in WordPress, upload the WooCommerce Bookings plugin file, activate it, and configure your booking settings.
Does WordPress Have Appointment Scheduling?
Yes, WordPress supports appointment scheduling through various plugins. You can use plugins by PluginHive WooCommerce Booking and Appointments Plugin to enable online booking, calendar integration, and automated reminders. These plugins allow businesses to manage appointments, reservations, and client scheduling directly from their WordPress website.